Why This Lab Comes First
A Microsoft 365 trial account allows you to create a full Microsoft 365 tenant for hands-on learning and MS-102 Microsoft 365 Administrator exam preparation.
Before you can manage users, configure security, or work with Exchange, SharePoint, or Teams, you need a Microsoft 365 tenant to work in. This chapter is your first essential lab in the MS-102 Microsoft 365 Administrator learning series.
The tenant you create here will be reused throughout the upcoming chapters for identity, security, compliance, and administration exercises. Think of it as your personal practice environment—safe to experiment in and designed to mirror real-world administration tasks.
If you are new to cloud platforms, don’t worry. No prior Microsoft 365 or Azure experience is required. This guide walks you through the setup step by step, exactly as you would do it in a real organisation.
Why Use a Microsoft 365 E3 Trial?
For learners who do not qualify for the Microsoft 365 Developer Program sandbox, the Microsoft 365 E3 trial is the best alternative for hands-on practice.
The E3 trial provides everything you need to set up a Microsoft 365 tenant and complete MS-102 labs:
- 30-day full-feature trial
- Access to Exchange Online, SharePoint Online, OneDrive, Teams, and Entra ID
- Ability to create multiple test users and groups
- Full tenant-level administrative access
- Coverage of all core services required for MS-102 exercises
In many cases, Microsoft allows the trial to be extended for an additional period if the tenant remains active. While extensions are not guaranteed, the initial 30 days are sufficient for structured exam preparation.
Prerequisites
Before you begin, make sure you have the following:
- A personal email account (Outlook, Hotmail, or similar)
- A mobile phone number for verification
- A modern web browser (Microsoft Edge or Google Chrome recommended)
- A debit or credit card for verification purposes
- You will not be charged during the trial period
Having these ready will ensure the setup process goes smoothly without interruptions.
Step-by-Step: Set Up a Microsoft 365 Trial Account
Step 1: Go to the Microsoft 365 Trial account Page
- Open your browser.
- Visit the official Microsoft 365 Trial account E3 page.
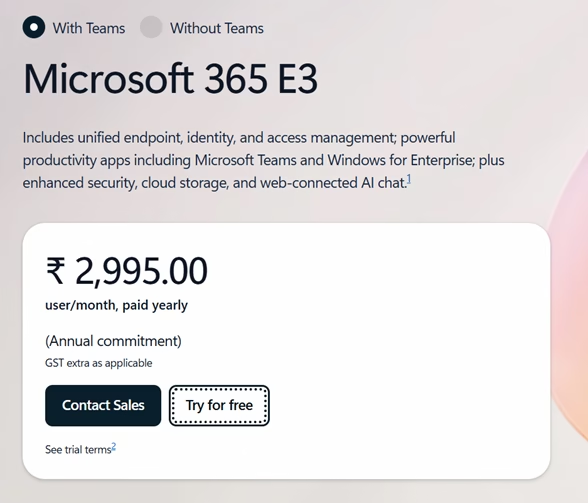
- Select Try for free for the one-month trial.

This begins the tenant creation workflow.
Step 2: Sign In or Create a Microsoft Account
You will be prompted to sign in with a Microsoft account.
- You can use an existing Microsoft account, or
- Create a new account using an Outlook or Hotmail address
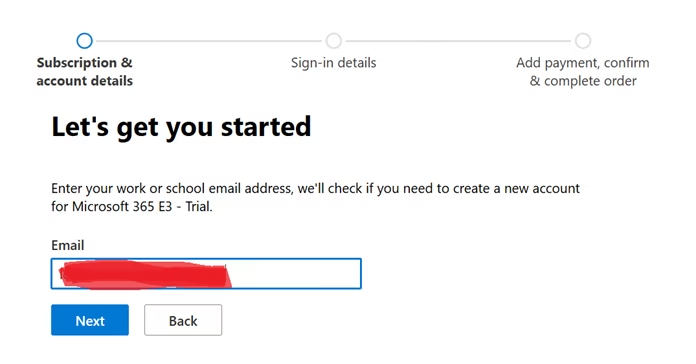
This account is used to start the signup process and does not have to be associated with an organisation.
Step 3: Enter Basic Organization Information
Next, Microsoft asks for basic organisational details. This information helps define the tenant.
Provide the following:

- Country or Region – select your actual location
- Company name – this can be a placeholder (for example, “TestOrg” or “LabCompany”)
- Company size – select 1–25 users (recommended for lab purposes)
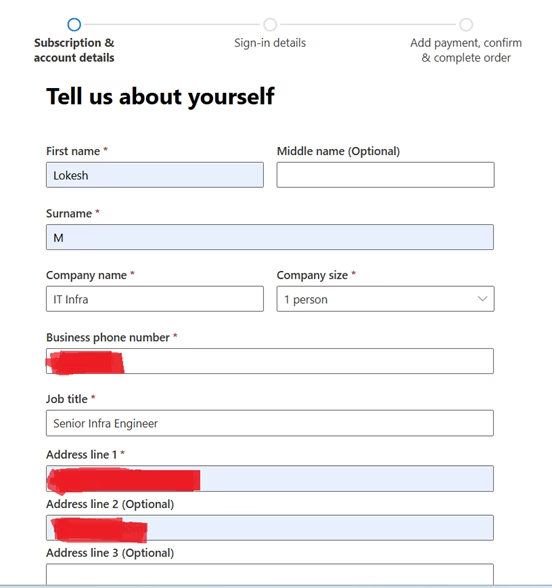
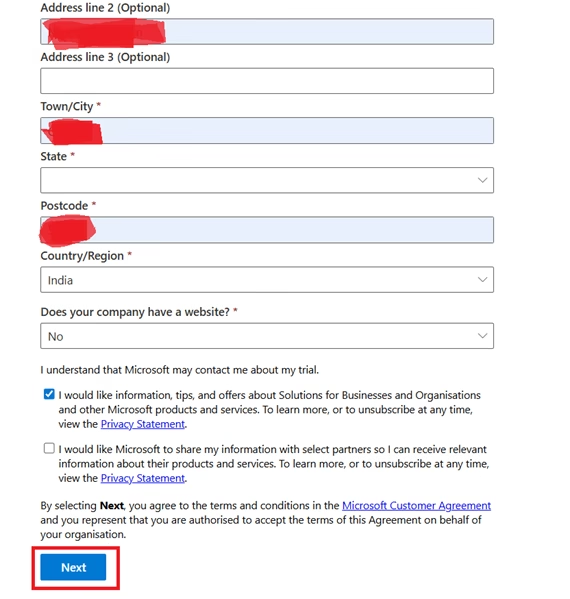
These values do not affect functionality and can be changed later.
Step 4: Phone Number Verification
Microsoft requires phone verification to reduce abuse of trial subscriptions.
- Select your country
- Enter your mobile number
- Enter the one-time password (OTP) sent via SMS
Once verified, you can proceed with tenant creation.
Step 5: Create Your Tenant Admin Account
This step is critical. You are now defining the core identity of your Microsoft 365 tenant.
You will be asked to:
- Choose a tenant name
- Example:
mycompany
- Example:
- This creates your default domain:
mycompany.onmicrosoft.com
- Create your first admin account:
- Example:
admin@mycompany.onmicrosoft.com
- Example:
- Set a strong password
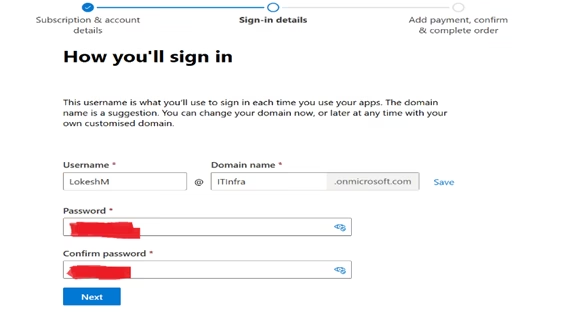
This account is assigned the Global Administrator role by default. It has full control over the tenant and all Microsoft 365 services. Store these credentials securely—you will use this account throughout the MS-102 labs.
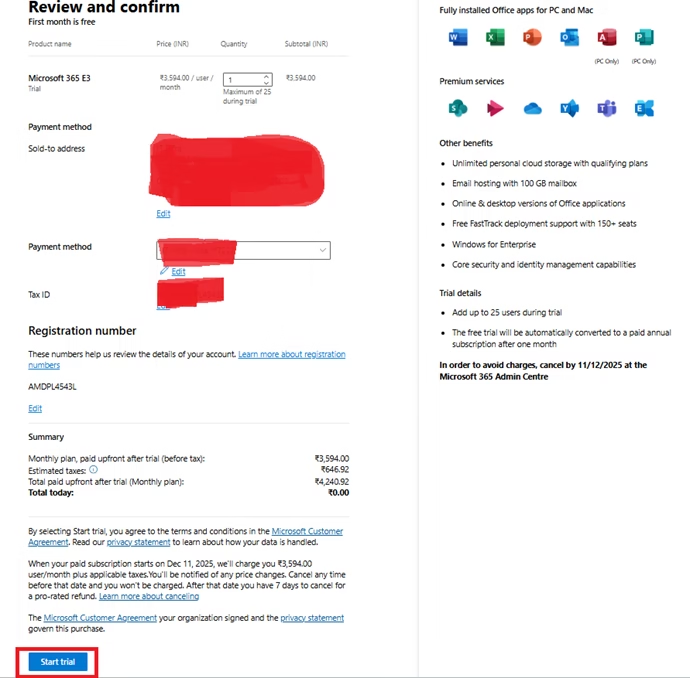
Step 6: Add a Payment Method (Important)
Microsoft requires a payment method to verify your trial eligibility.
Key points to understand:
- The card is used for verification only
- You are not billed during the trial period
- No charges occur unless you explicitly convert to a paid subscription
After your tenant is created:
- Go to Billing
- Select Your products
- Turn off recurring billing
This ensures the subscription does not auto-renew after the trial ends.
Step 7: Complete Setup and Access the Admin Center
Once setup is complete, you will be redirected to the Microsoft 365 Admin Center:
https://admin.microsoft.com
This is your central management portal. From here, you can manage:
- Users and groups
- Licenses and subscriptions
- Security and compliance settings
- Microsoft 365 services such as Exchange, SharePoint, Teams, and Intune
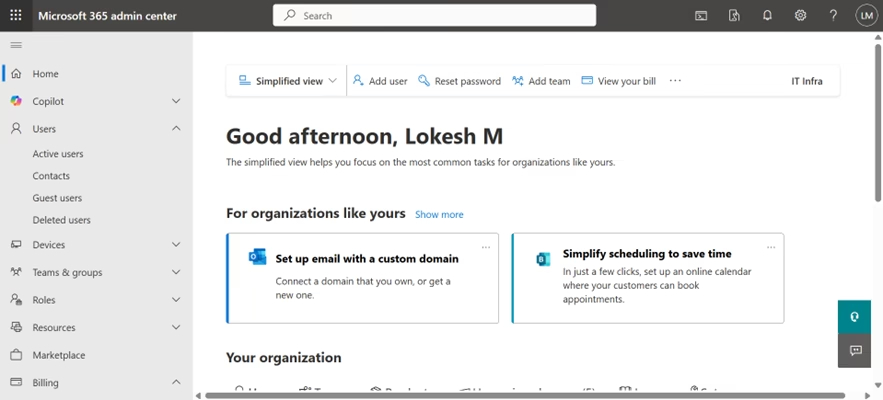
At this point, your Microsoft 365 tenant is fully operational.
What You Have Now
After completing this setup, you now have:

- A fully functional Microsoft 365 tenant
- A default
onmicrosoft.comdomain - A Global Administrator account
- Access to all core Microsoft 365 services
- A safe environment for hands-on MS-102 labs
This tenant will serve as your learning platform for identity configuration, security policies, compliance controls, and troubleshooting scenarios.
Common Mistakes to Avoid
Be mindful of these common issues:
- Forgetting to disable recurring billing after setup
- Losing Global Administrator credentials
- Using weak passwords for admin accounts
- Creating the tenant with personal naming that may confuse you later
Avoiding these mistakes early will save time and prevent unnecessary issues during your study.
Why This Lab Matters for MS-102
The MS-102 Microsoft 365 Administrator exam focuses heavily on real administrative workflows. This lab directly supports exam readiness by enabling you to:
- Practice identity and access management
- Configure security and compliance policies
- Understand tenant-wide scope and permissions
- Gain confidence navigating the admin portals
Rather than memorising concepts, you will be applying them in a real tenant—exactly how Microsoft expects administrators to work.
Summary
In this chapter, you:
- Set up a Microsoft 365 Trial Account using a Microsoft 365 E3 trial
- Created a Global Administrator account
- Accessed the Microsoft 365 Admin Center
- Prepared a lab environment for MS-102 practice
This is the foundation for all future chapters in the series.
Understanding the Microsoft 365 tenant is the first step toward thinking like a real administrator, not just a feature-level operator. Every identity decision, security policy, and workload configuration in Microsoft 365 starts at the tenant level.
If you’re new to this learning series, start with the main MS-102 Microsoft 365 Administrator overview, where we explain how all chapters connect and what skills you’ll build across the journey.
For the most accurate and up-to-date exam objectives and reference material, Microsoft maintains the official MS-102 documentation on Microsoft Learn. This series complements those resources by focusing on real-world administrative understanding.
What’s Next
With your Microsoft 365 tenant now set up, the next step is to familiarise yourself with the tenant and its core administrative areas.
In the next chapter, we’ll explore the Microsoft 365 Admin Center, understand the home dashboard, and learn where to manage users, licenses, security, and services. This orientation is essential before making any configuration changes.