Managing users in Microsoft Entra ID is one of the core responsibilities of a Microsoft 365 administrator. Every identity in your tenant — whether cloud-only, hybrid, or guest — must be created, secured, licensed, monitored, and eventually removed properly.
For the MS-102 Microsoft 365 Administrator exam, user management is not just about clicking “Create User.” It includes:
- Creating users
- Editing properties
- Assigning licenses
- Resetting passwords
- Unlocking accounts
- Managing guest users
- Monitoring sign-ins
- Restoring deleted accounts
This guide walks through each task clearly and practically.
Where to Manage Users
Users can be managed from two locations:
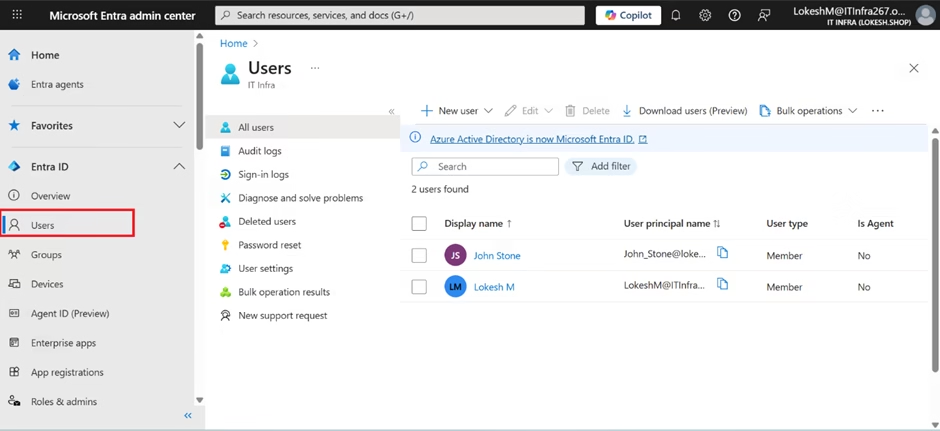
1️⃣ Microsoft 365 Admin Center
Users → Active Users
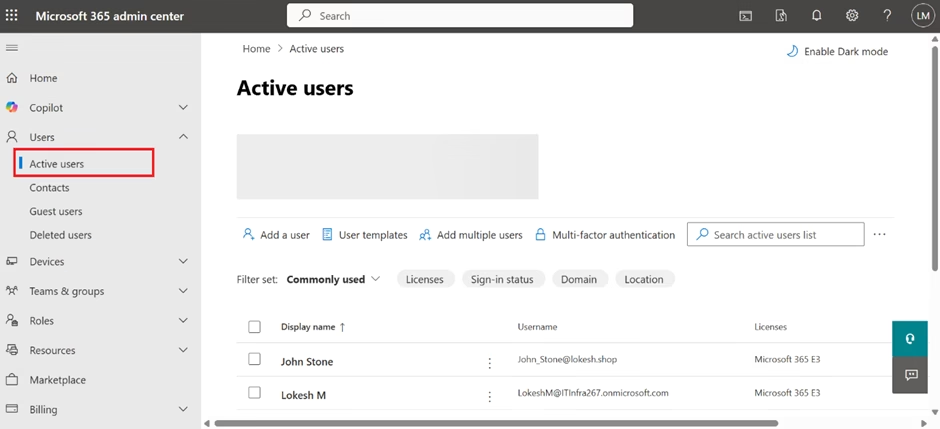
2️⃣ Microsoft Entra Admin Center (Recommended)
Entra ID → Users
For identity-focused tasks, the Entra Admin Center is preferred.
Creating a Cloud-Only User (Step-by-Step)
Most lab and many production users in Microsoft 365 are cloud-only (not synced from on-premises AD).
Learning Objectives
After completing this guide, you will be able to:
- Create a user in the Microsoft 365 Admin Center and Entra Admin Center.
- Explain how to apply least privilege and enforce MFA for users.
- Describe naming standards for consistent user management.
- Identify the correct process for disabling versus deleting accounts.
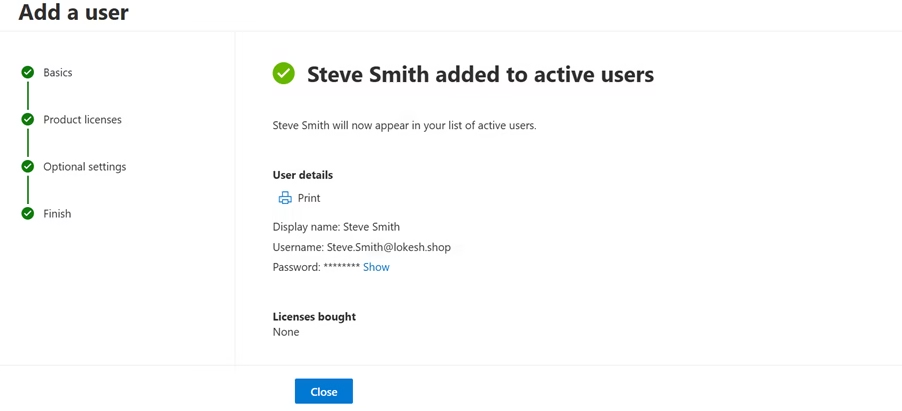
Create a User in the Microsoft 365 Admin Center
- Go to Users → Active users
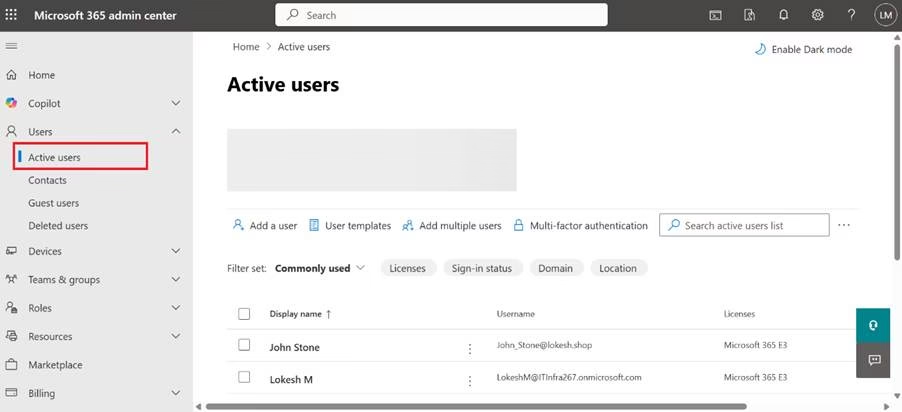
- Click Add a user

- Fill in:
- First name & Last name
- Display name
- Username (e.g., john@yourdomain.com)
- Choose Auto-generate password or set a custom password
- Select Require this user to change their password on first sign-in
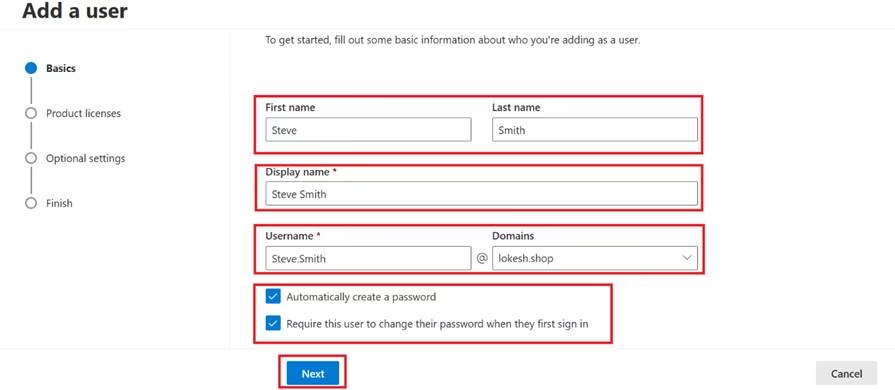
- Click on Next
- Assign a location
- Assign licenses (e.g., Microsoft 365 E3)
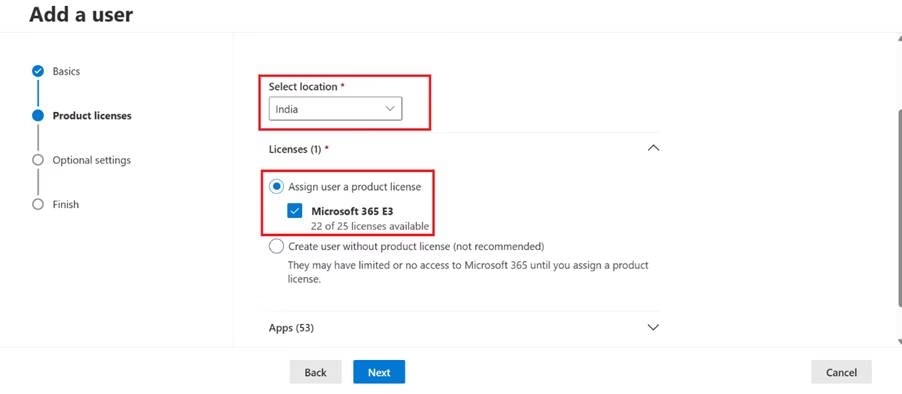
- Select which Apps should be assigned
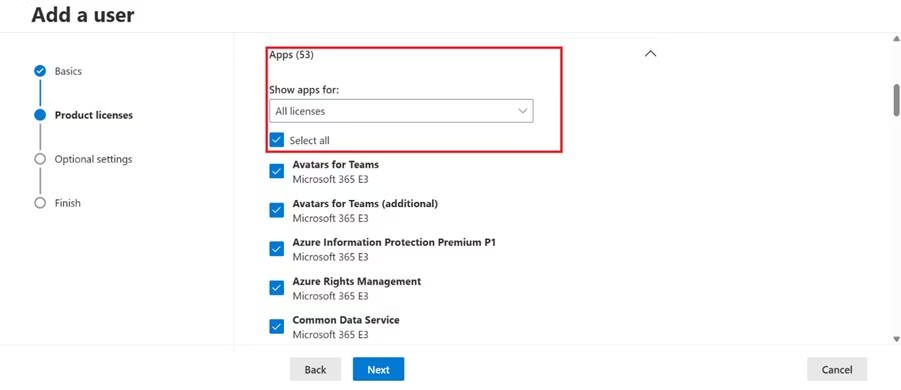
- Click on Next
- In the Optional Settings page, enter profile info like designation, department, phone number, etc.
- Click Finish adding
Create User in Entra Admin Center
- In https://entra.microsoft.com,
- Go to Identity → Users → All users
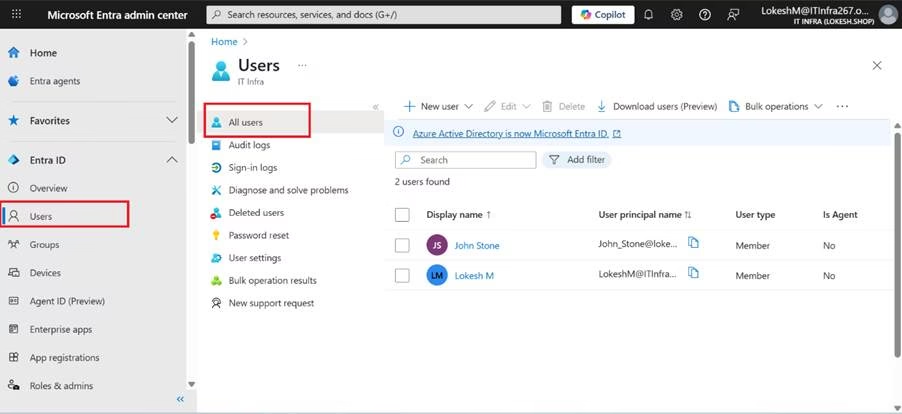
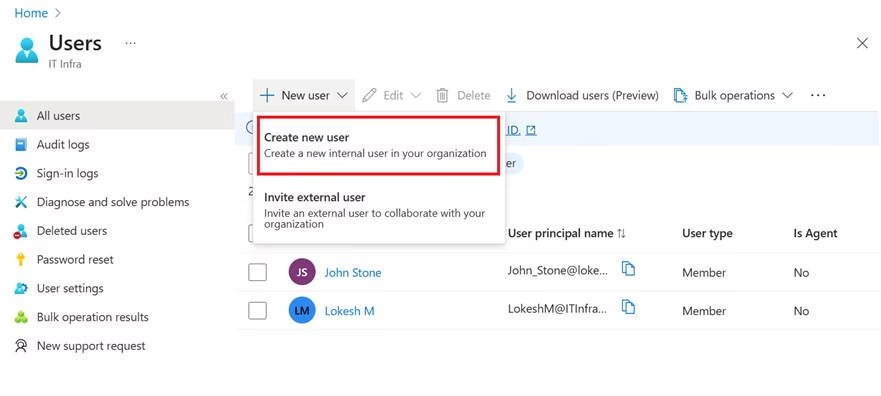
- Click New user → Create new user
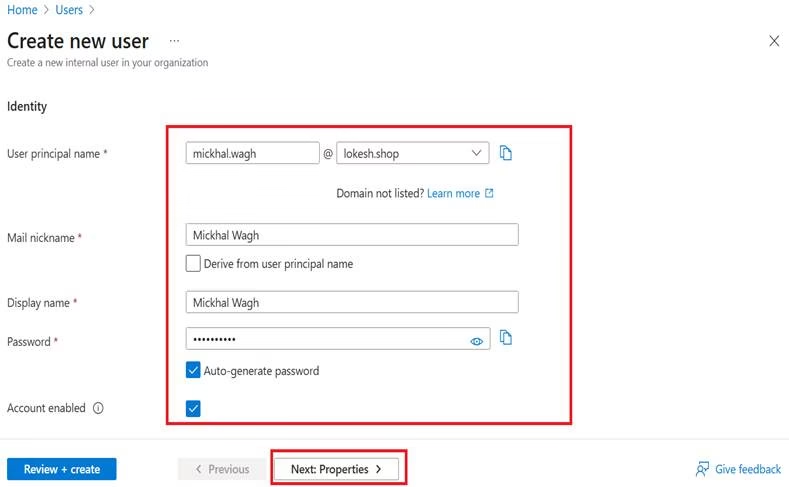
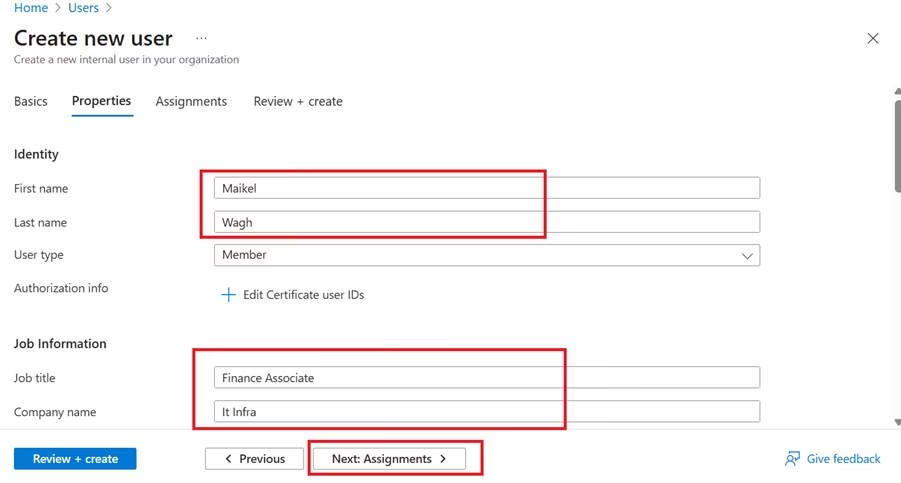
- Provide:
- User principal name (UPN)
- Name
- Initial password
- First Name
- Last Name
- Job Information
- Optionally assign:
- Groups
- Roles
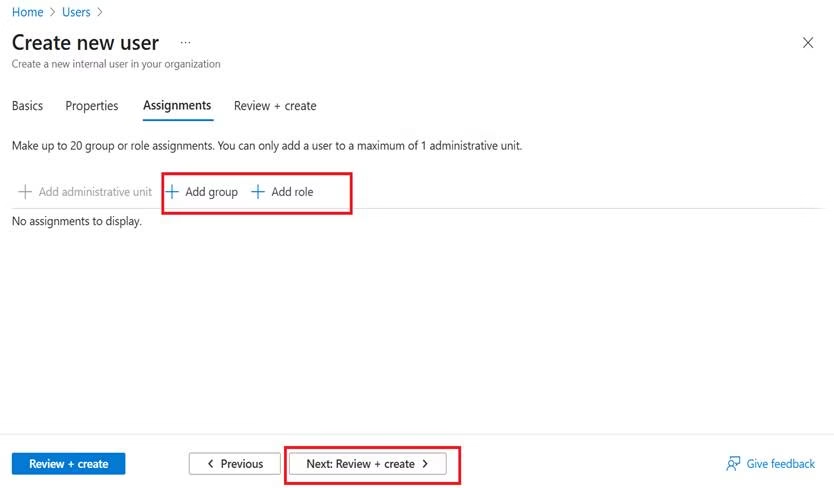
- Click Review + Create
- Click Create
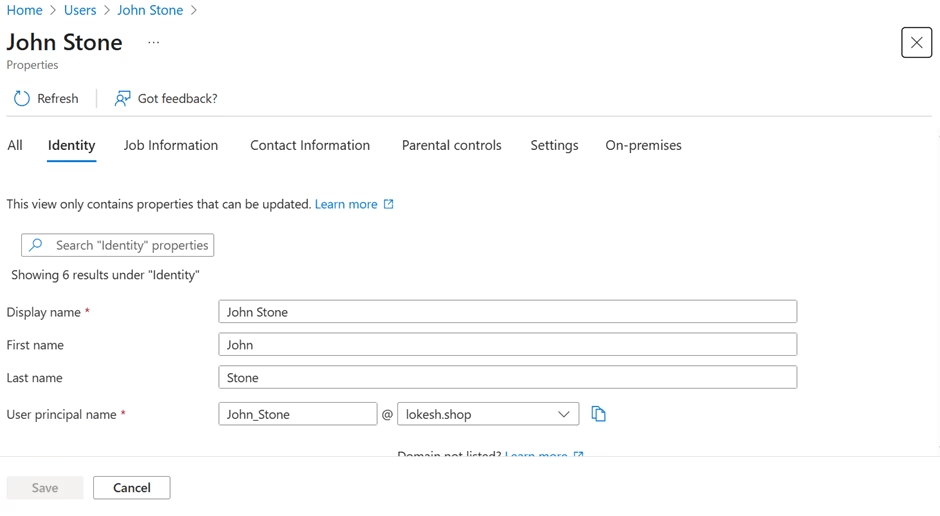
Viewing and Editing User Properties
Select a user → Review these sections:
- Overview
- Properties
- Assignments
- Licenses
- Groups
- Roles
Common changes administrators make:
- Job title
- Department
- Manager
- Usage location
- Office location
Usage location must be set before license assignment.
Assigning Licenses to Users
Licensing was covered in detail in Chapter 5. Here’s how it ties to user management:
- Open a user in Active users
- Go to Licenses and apps
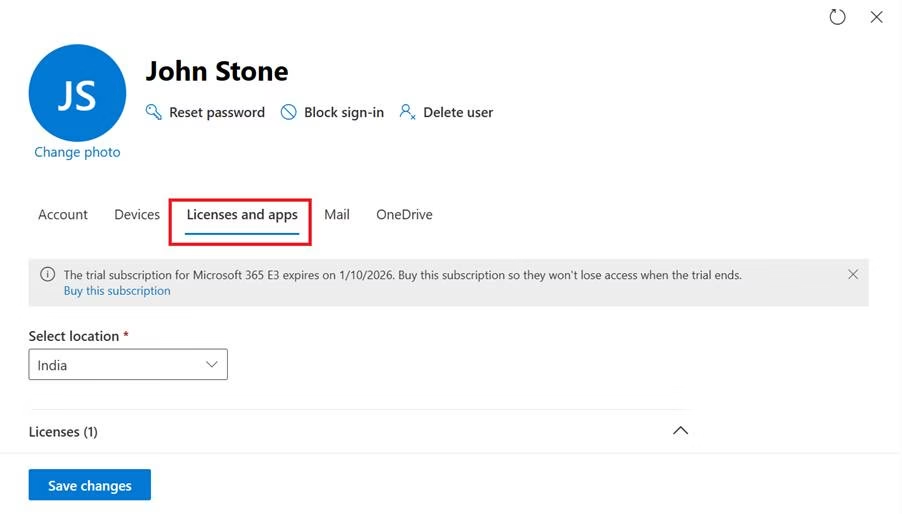
- Select or unselect:
- Microsoft 365 E3/E5
- Standalone services or add-ons
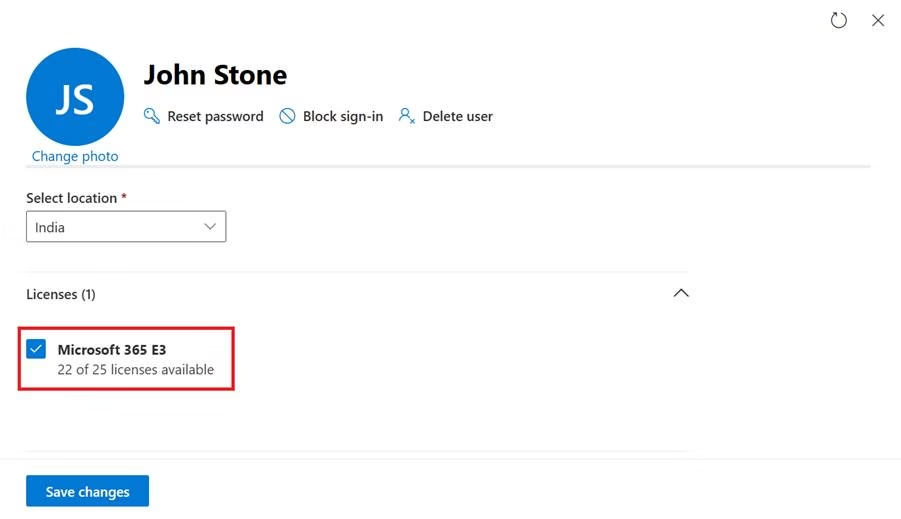
- Toggle specific apps (Teams, SharePoint, etc.) ON or OFF
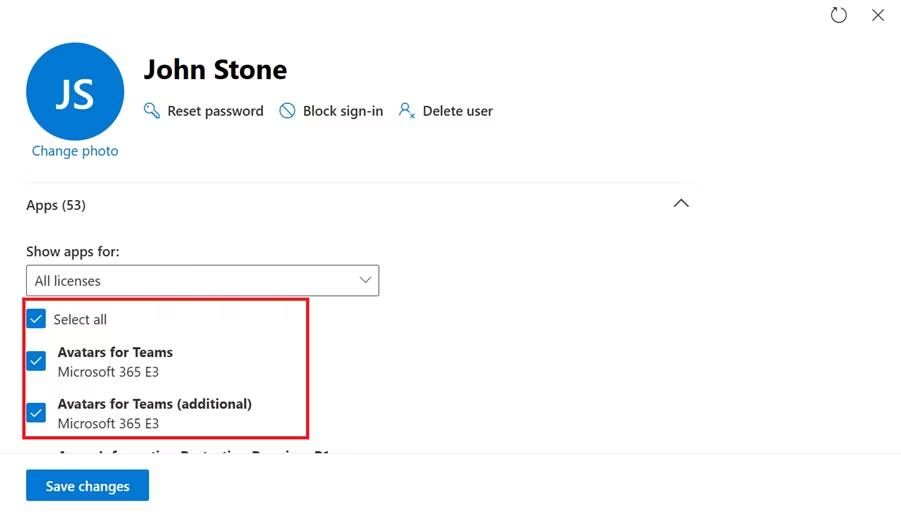
- Save changes
A user without a license:
- Cannot access services such as Exchange, Teams, and SharePoint
- Might still authenticate, but see limited apps
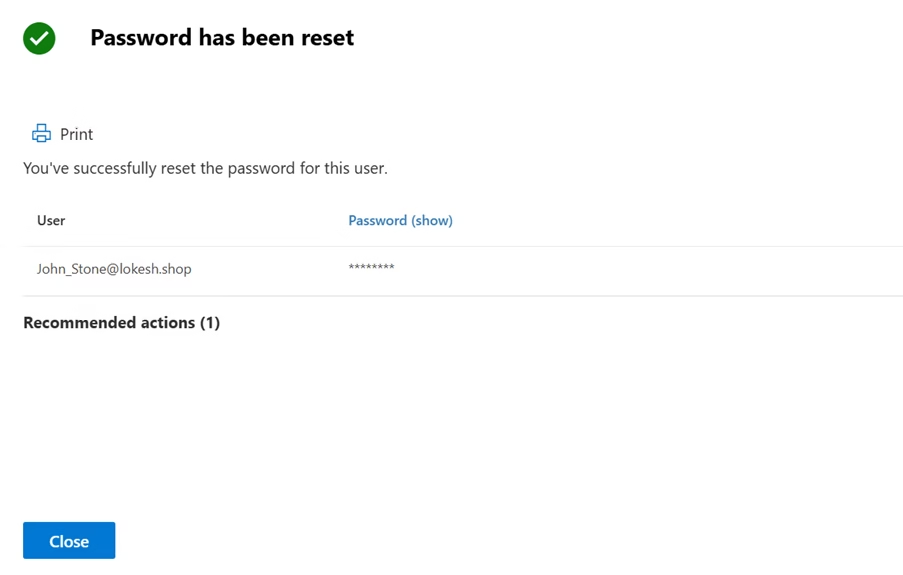
Resetting Passwords
Password issues are one of the most common support requests.
Resetting a User Password
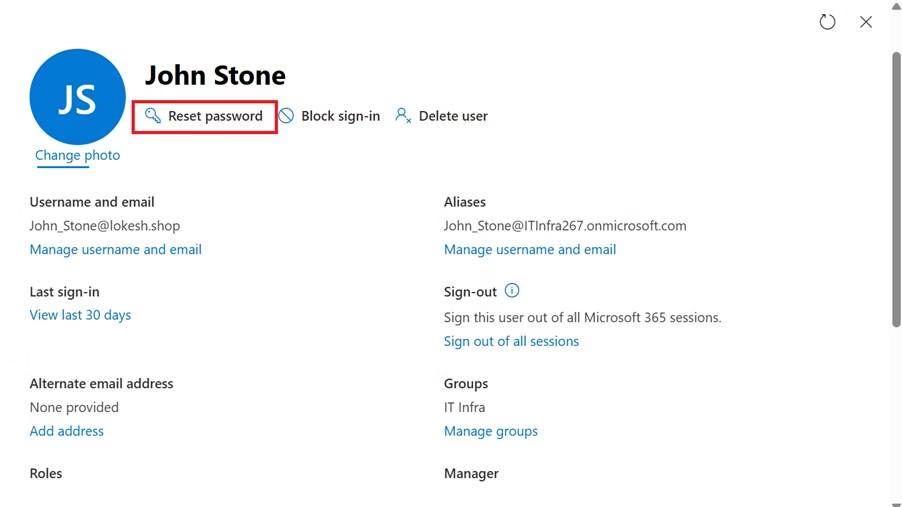
- In Admin Center → Users → Active users
- Select the user
- Click Reset password
- Choose whether to:
- Auto-generate a password
- Manually set a password
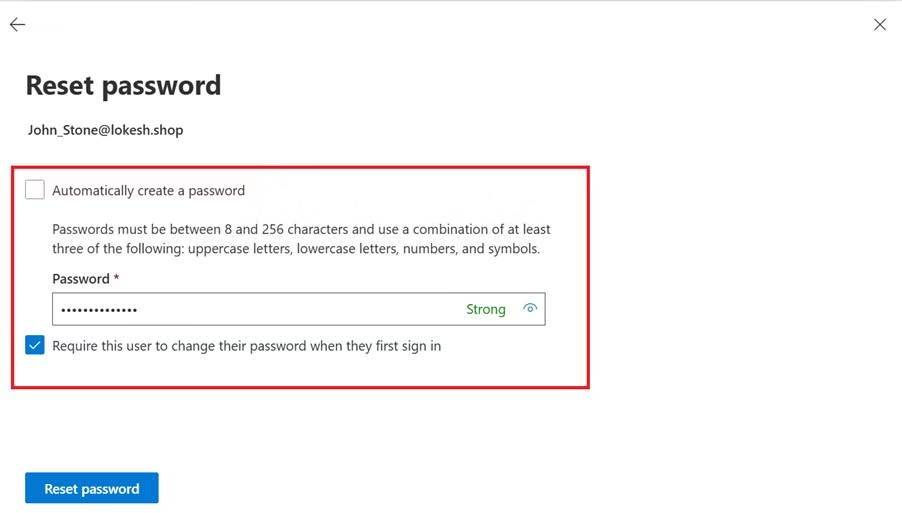
- Share the new password securely with the user
Unlocking Accounts
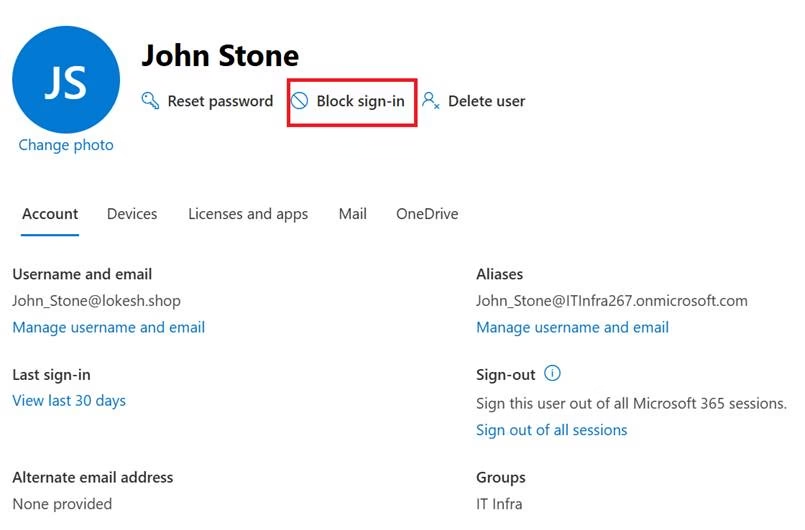
If you suspect compromise or need to disable access:
- Open the user in Active users
- Click Block sign-in
- Choose Block this user from signing in
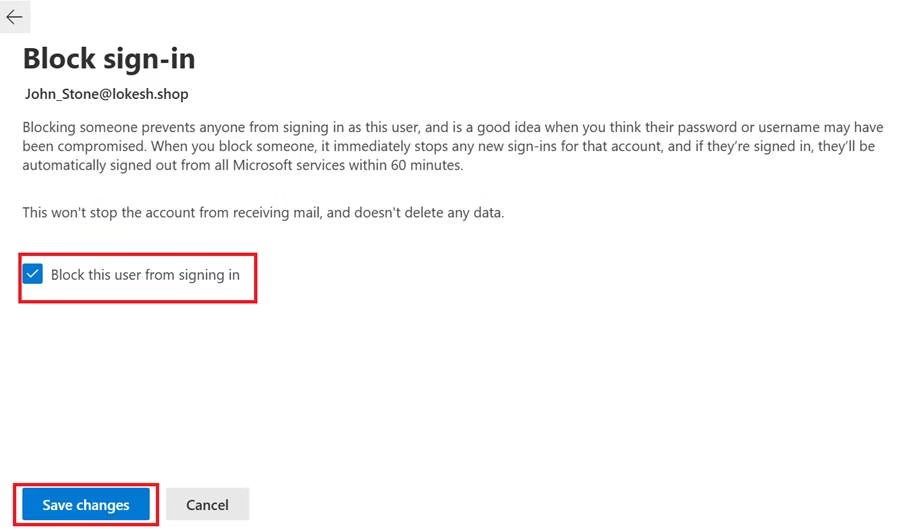
- Save changes
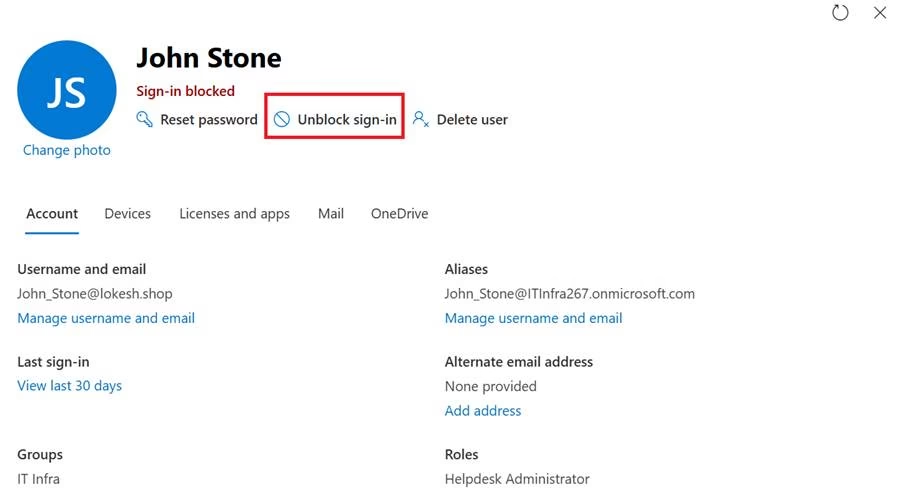
To restore access, set it back to Allow sign-in.
Signing the User Out of All Sessions
To force the user to re-authenticate:
- In the user’s details, use Sign out of all sessions
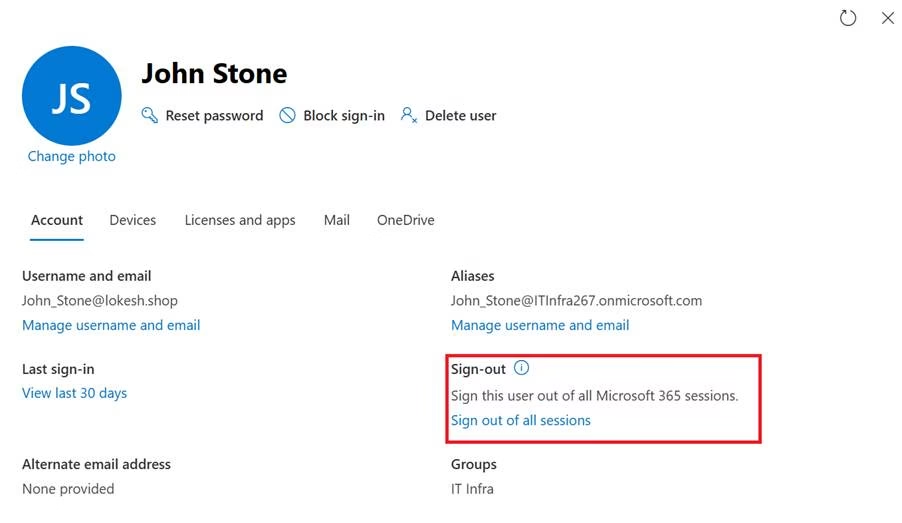
- The user will be logged out of browser sessions and apps over time
Managing Guest Users
Guest users are external identities invited to your tenant.
To invite a guest:
- Entra ID → Users
- New user → Invite external user
- Enter external email
- Send invitation
Guests can:
- Access Teams
- Collaborate in SharePoint
- Join groups
Guest access must align with security policies.
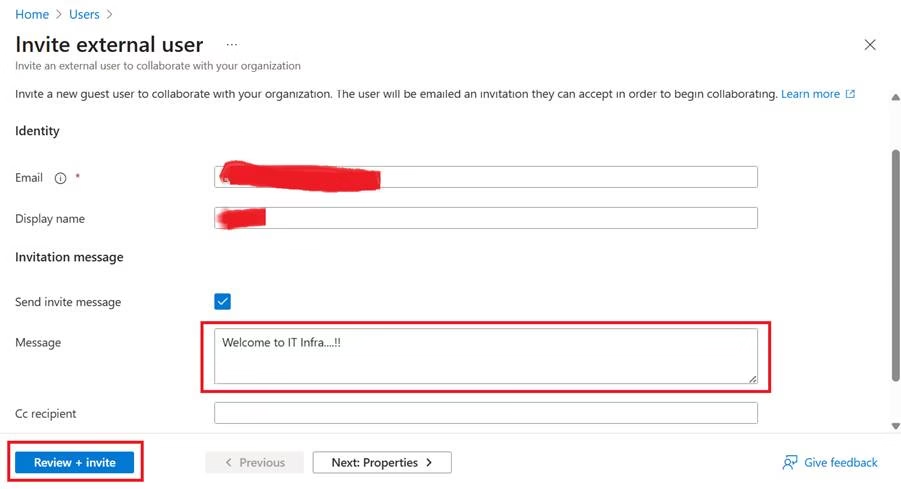
- Go to https://entra.microsoft.com
- Navigate to Entra ID → Users → All users → Drop down New user → Invite external user

- Fill in Basic details and Review + Invite
- Client email ID
- Client Display name
- Welcome message
Bulk User Operations
For larger environments, managing users one by one is inefficient.
Bulk Add Users (CSV)
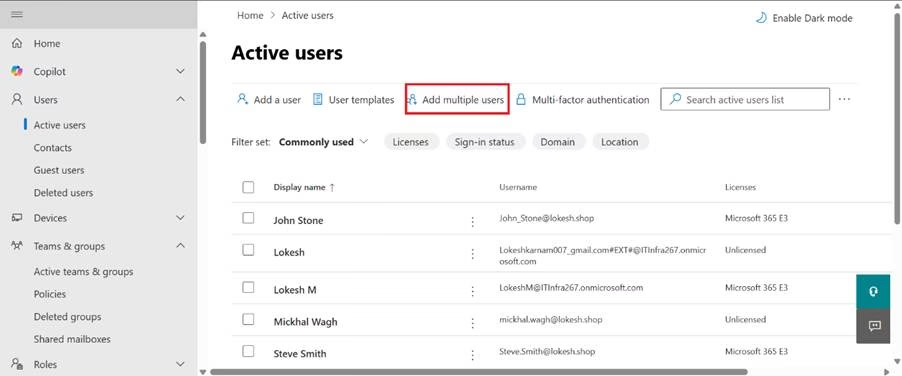
- In Admin Center → Users → Active users
- Click Add multiple users
- Download the CSV template
- Fill in:
- Usernames
- Names
- Usage location
- Initial passwords (optional)
- Upload the CSV and complete the wizard
Bulk Edit Users
You can select multiple users and:
- Assign/removal of licenses in bulk
- Block/Unblock sign-in
- Change usage location
For advanced automation, organisations will use:
- PowerShell (e.g., Connect-MgGraph, New-MgUser)
- Microsoft Graph API
Deleted Users and Account Recovery
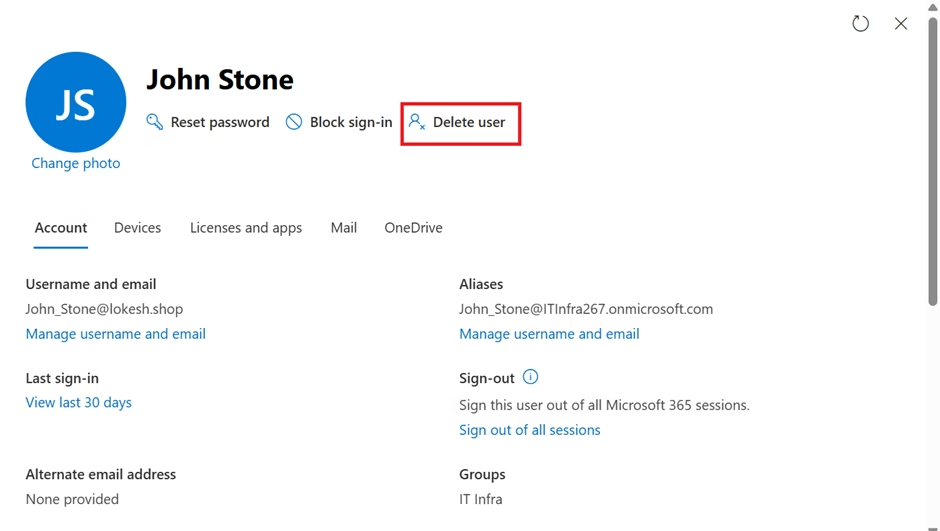
When a user is deleted:
- Account enters “soft delete” state
- Retained for 30 days
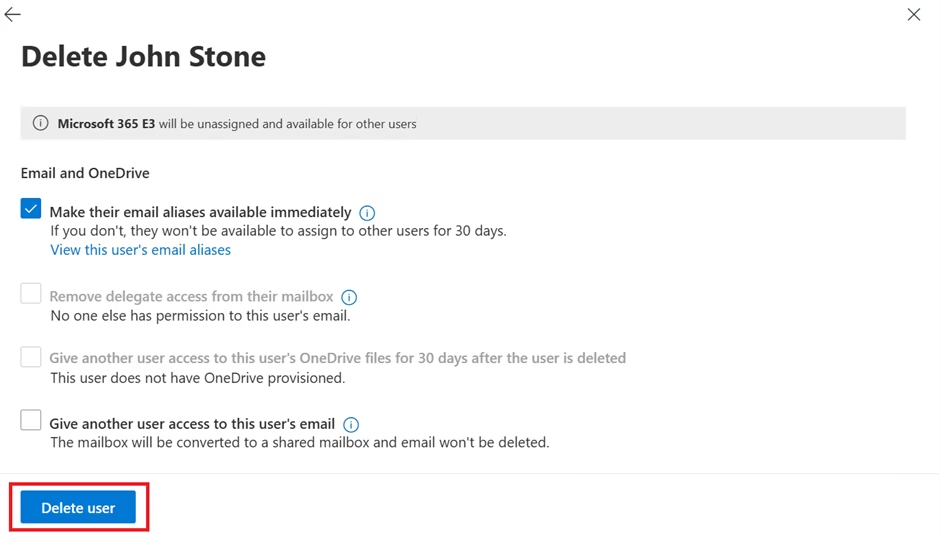
Restoring a Deleted User
- Go to Users → Deleted users
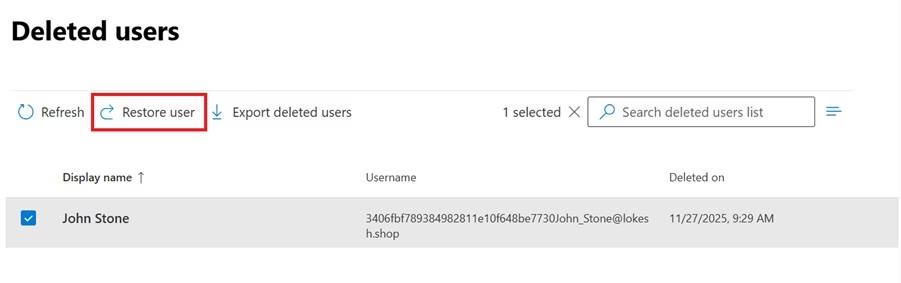
- Select the user
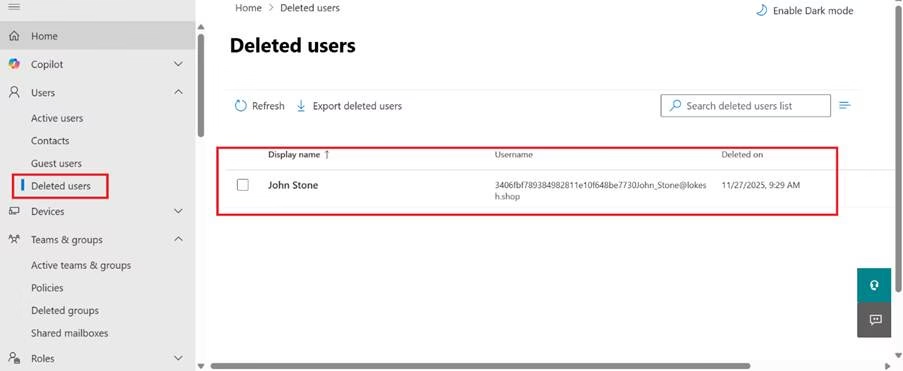
- Click Restore user
- Optionally reassign licenses
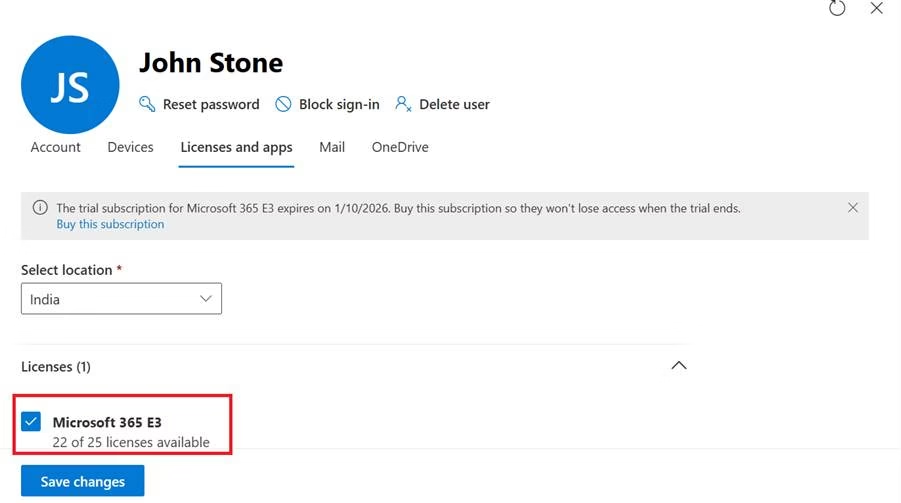
Mailbox and OneDrive content can often be recovered after a restore (depending on retention policies).
After 30 days, the account is permanently deleted and cannot be recovered without a backup or exceptional retention.
Understanding retention is important for MS-102.
Monitoring User Sign-Ins
Sign-in logs are located in:
Entra ID → Sign-in Logs
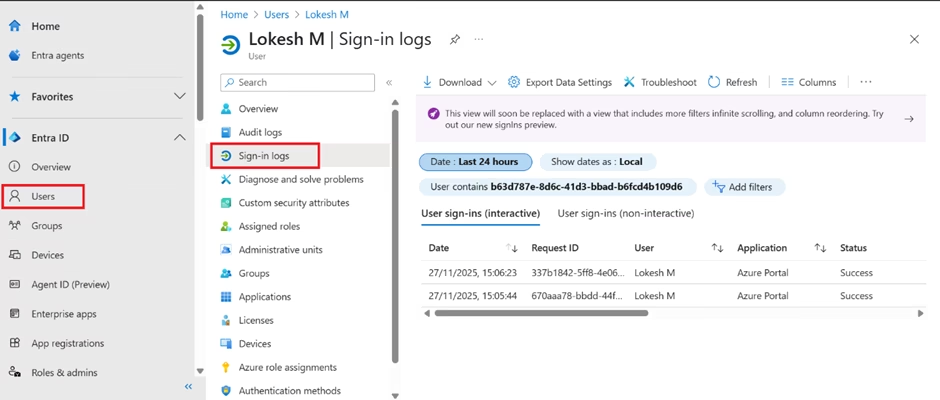
Here you can review:
- Successful logins
- Failed attempts
- Location
- Device
- Risk level
Sign-in logs are heavily referenced in identity troubleshooting scenarios.
Managing Group Membership
Users often receive:
- Licenses
- Access
- Permissions
through group membership.
Create a Group
- Open the user in Entra Admin Center
- Go to the Groups tab
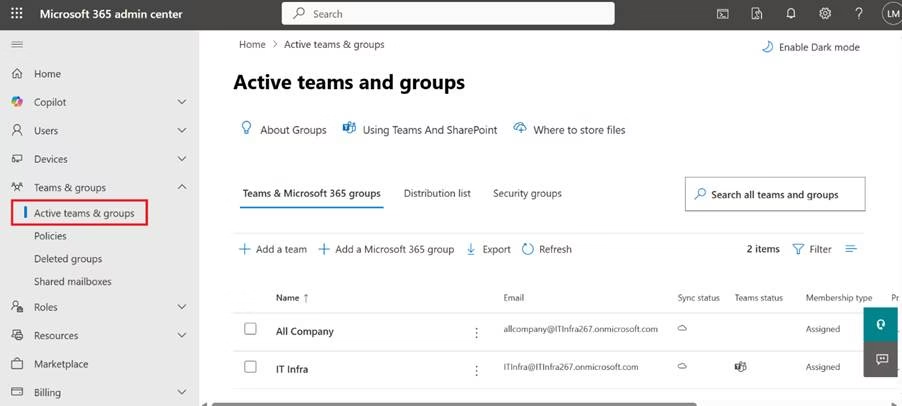
- Select the group that you want to create
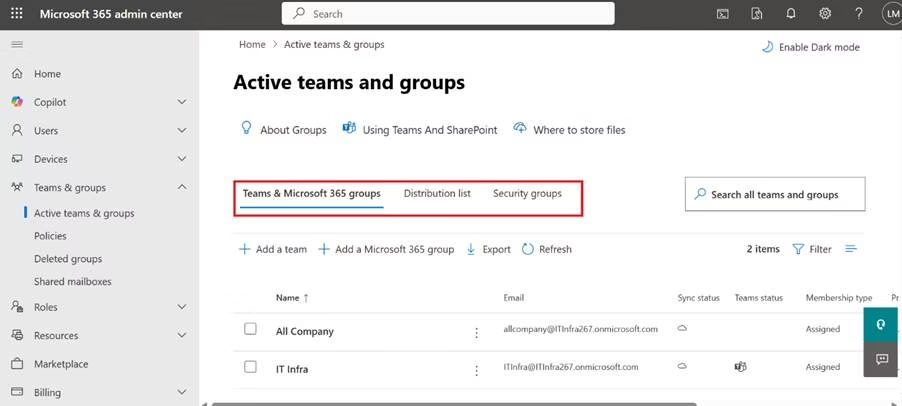
- Add a Microsoft 365 group
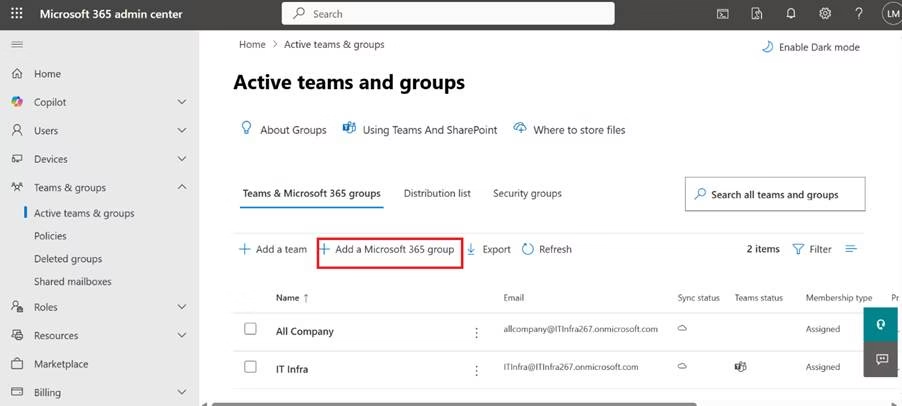
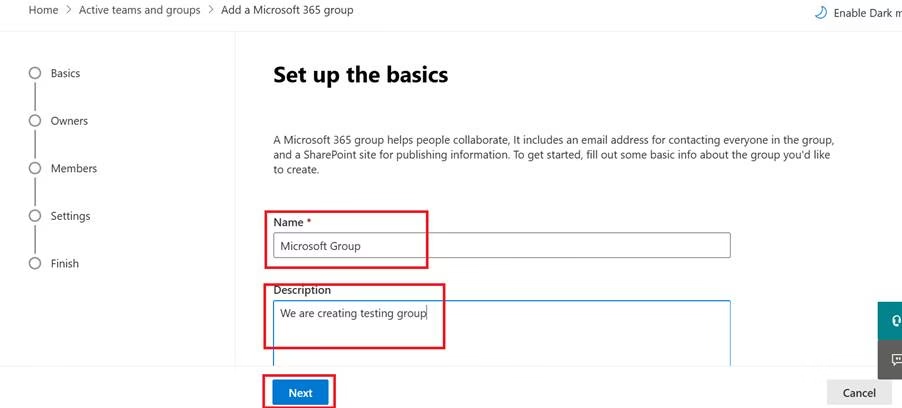
- Fill in basic details
- Microsoft Group Name
- Description: For what this group is used for
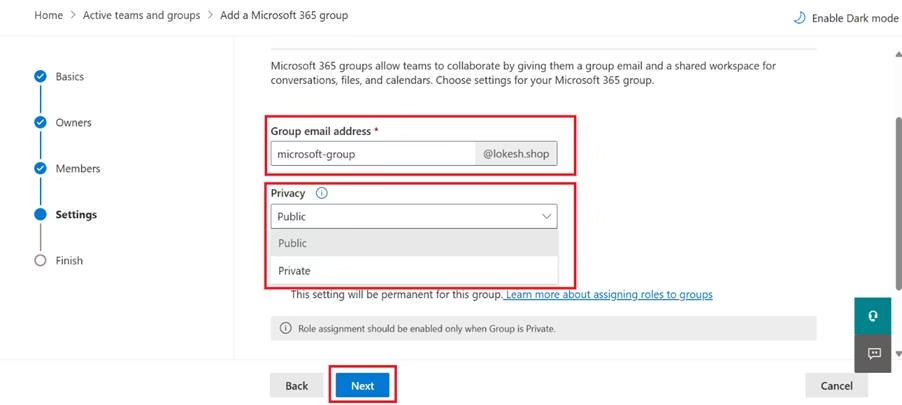
- Fill in
- Group email address
- Privacy: Public or Private
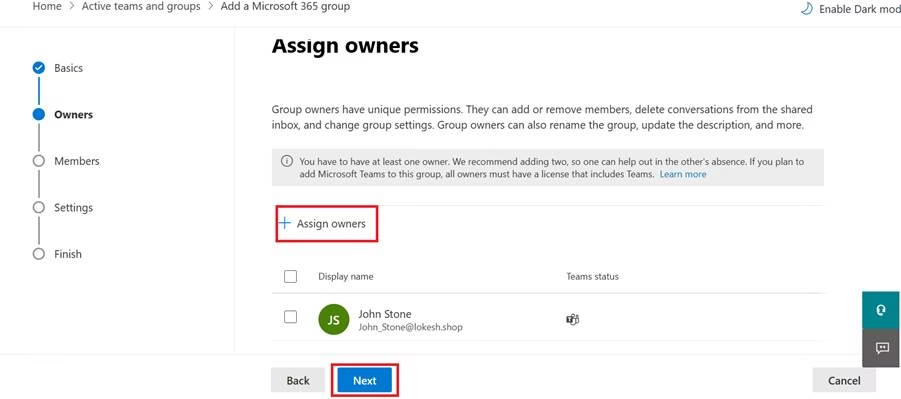
- Add Assign owners
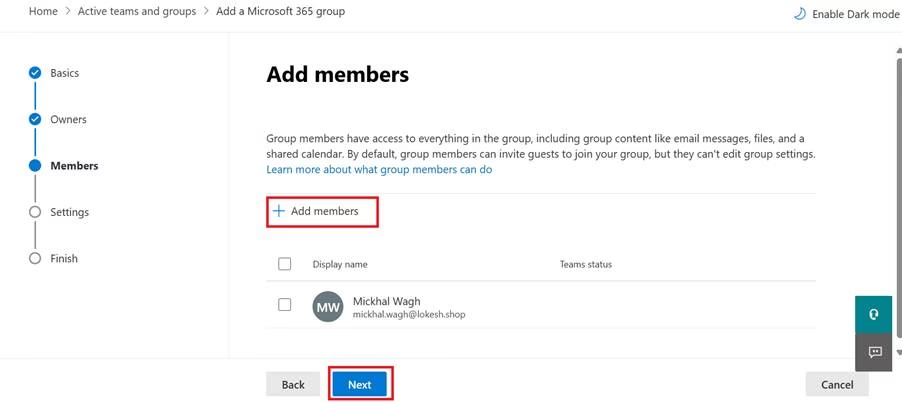
- Add members
- Review and Click Create Group
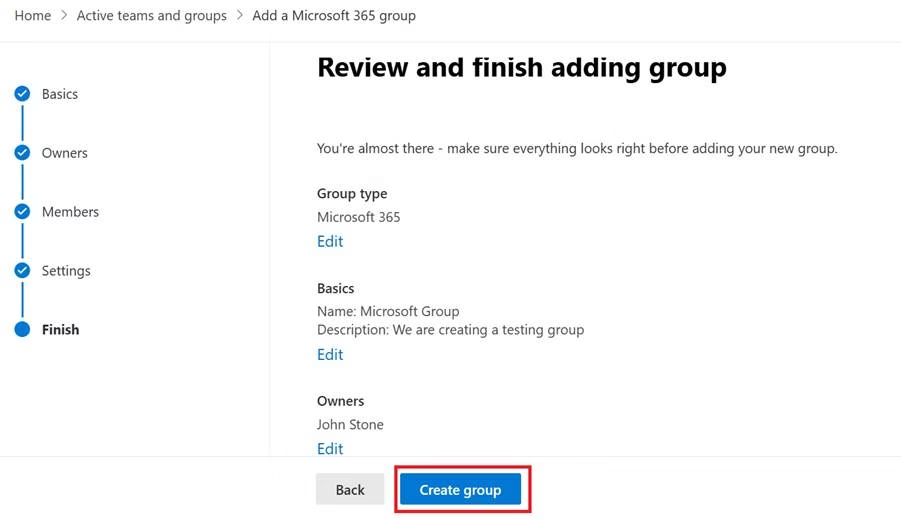
To manage:
- Open user
- Select Groups
- Add or remove membership
Group-based licensing and Conditional Access depend on this.
Managing Users in Microsoft Entra ID: Best Practices
Apply Least Privilege
Do not assign unnecessary admin roles.
Enforce MFA
All users should be protected with Multi-Factor Authentication.
Use Naming Standards
Consistent username format prevents confusion.
Disable Before Deleting
If an employee leaves:
- Block sign-in
- Remove license
- Preserve data
- Then delete
Why Managing Users in Microsoft Entra ID Matters for MS-102
User management is central to:
- Identity lifecycle
- Access control
- Security enforcement
- Compliance
- Automation
Exam scenarios often describe:
- A user unable to access Teams
- A mailbox not provisioning
- A compromised account
- A guest access issue
Nearly all these issues start with identity configuration.
Final Insights
Managing users in Microsoft Entra ID is not just administrative work—it is identity governance.
Every user represents:
- A potential security risk
- A licensing decision
- An access boundary
- A compliance responsibility
When you understand user lifecycle management deeply, you move beyond account creation and begin managing identity strategically.
If you’re new to this learning series, start with the main MS-102 Microsoft 365 Administrator overview, where we explain how all chapters connect and what skills you’ll build across the journey.
For the most accurate and up-to-date exam objectives and reference material, Microsoft maintains the official MS-102 documentation on Microsoft Learn. This series complements those resources by focusing on real-world administrative understanding.
In the next chapter, we will explore: Multi-Factor Authentication (MFA) and Authentication Methods
That is where identity protection becomes active defense.
2 thoughts on “Managing Users in Microsoft Entra ID: The Essential Guide for Confident MS-102 Administrators”