Learning Objectives
After completing this guide, you will be able to:
- Explain the prerequisites for installing Microsoft Entra Connect.
- Install Microsoft Entra Connect on Windows Server step-by-step.
- Verify successful directory synchronization.
- Identify common configuration issues during installation.
Introduction
In today’s hybrid IT environments, organizations often maintain both on-premises Active Directory and cloud-based identities in Microsoft 365. Managing identities separately in both environments can quickly become complex and error-prone.
This is where Microsoft Entra Connect plays a crucial role.
Microsoft Entra Connect is a synchronization tool that bridges your on-premises Active Directory with Microsoft Entra ID (formerly Azure AD). It ensures that users, groups, and credentials are consistently available across both environments.
Why is Entra Connect Important?
- Enables Hybrid Identity
- Reduces manual user management
- Supports Single Sign-On (SSO)
- Provides authentication options like:
- Password Hash Synchronization (PHS)
- Pass-through Authentication (PTA)
- Federation (ADFS)
For MS-102 exam preparation and real-world implementation, understanding this setup is essential.
🗺️ Enterprise Hybrid Identity Architecture
Users and groups are synchronized from on-premises Active Directory through Microsoft Entra Connect — including Password Hash Synchronization — into Microsoft Entra ID, which then authenticates access to Microsoft 365 services.
Prerequisites (Don’t Skip This!)
Before installing Entra Connect, you must prepare your environment properly.
Server Requirements
Ensure your server meets the following:
- OS: Windows Server 2016 or later (2019/2022 recommended)
- Domain-joined server
- Minimum:
- 4 GB RAM (8 GB recommended)
- 70 GB disk space
- .NET Framework 4.7.2 or later
Best Practice: Install on a dedicated member server, not a Domain Controller.
Required Accounts
You will need:
- Enterprise Admin Account (on-prem AD)
- Global Administrator Account (Microsoft 365)
Tip: Use temporary elevated accounts and avoid permanent high-privilege usage.
Network & Security Requirements
- Internet access to Microsoft 365 endpoints
- TLS 1.2 enabled
- Firewall ports open (HTTPS 443)
If you’re using a firewall like FortiGate (like your setup), ensure outbound access is not restricted.
Install Microsoft Entra Connect on Windows Server
Step 1: Download Entra Connect
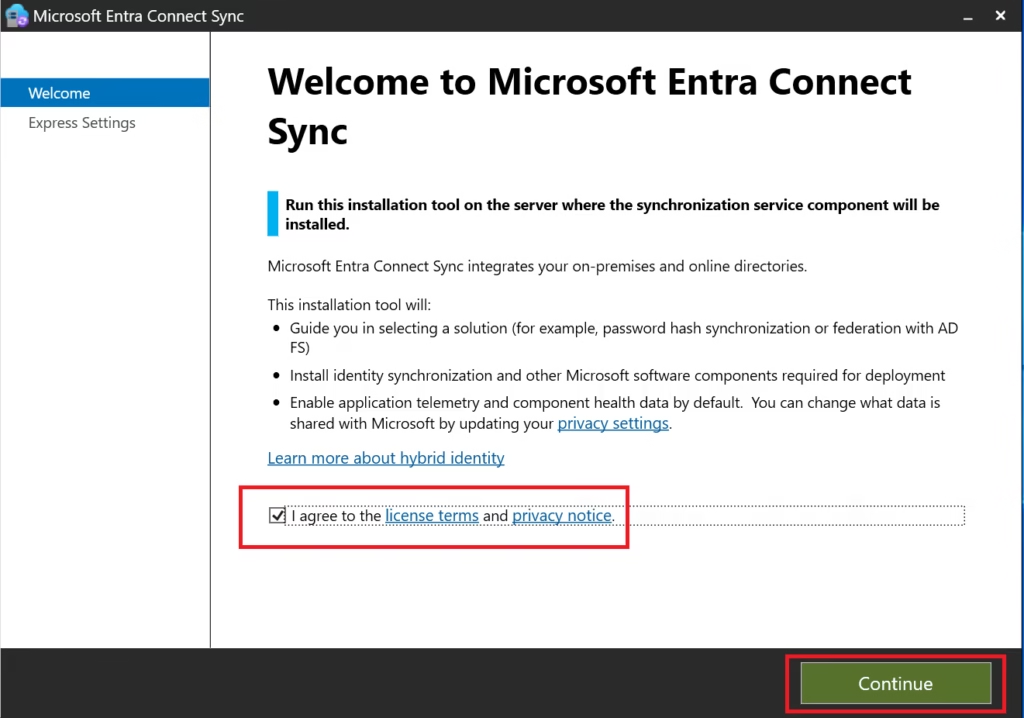
Download the latest Microsoft Entra Connect Sync installer from the Microsoft Entra admin portal or official Microsoft link.
Run the installer as Administrator.
Step 2: Choose Installation Type
Select:
- Customize
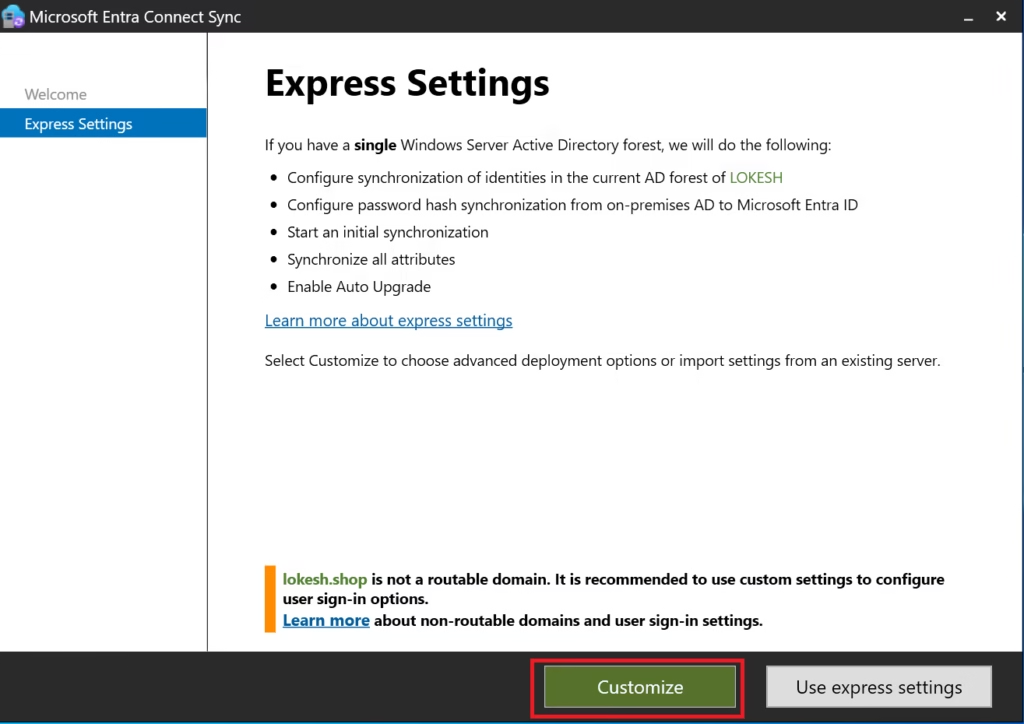
Why:
- Express settings hide important decisions
- MS‑102 expects an understanding of installation choices
- Custom install allows complete visibility
Click Next.
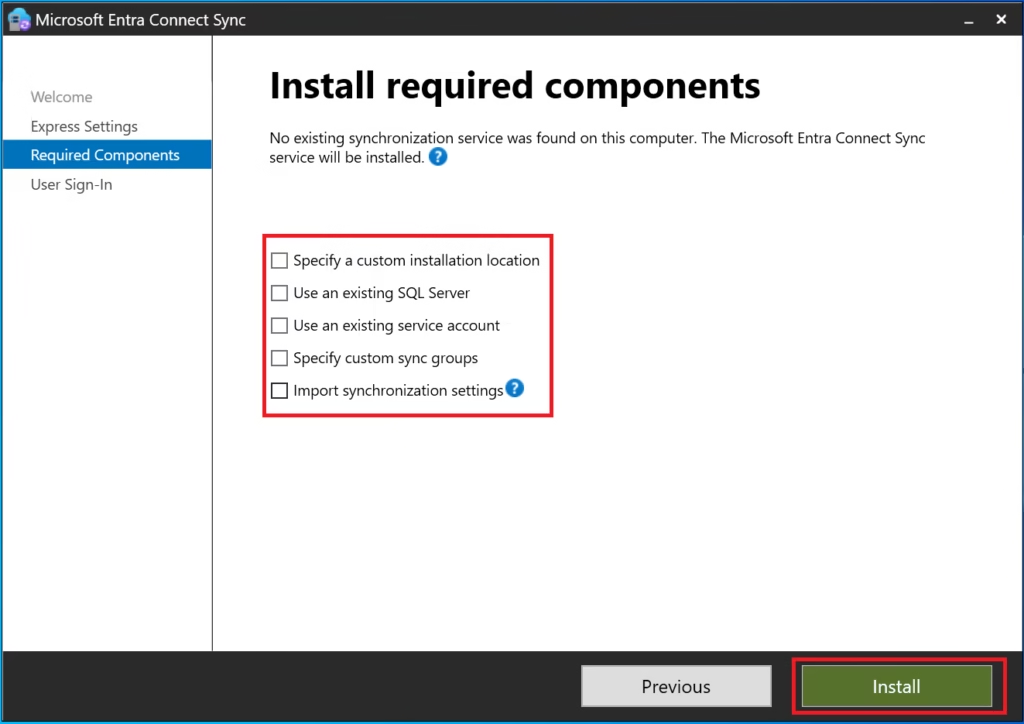
Step 3: Required Components
Leave default selections enabled:
- Synchronization services
- SQL Express (for small/medium environments)
Click Next.
Step 4: User Sign‑In Method
Select:
- Password Hash Synchronization
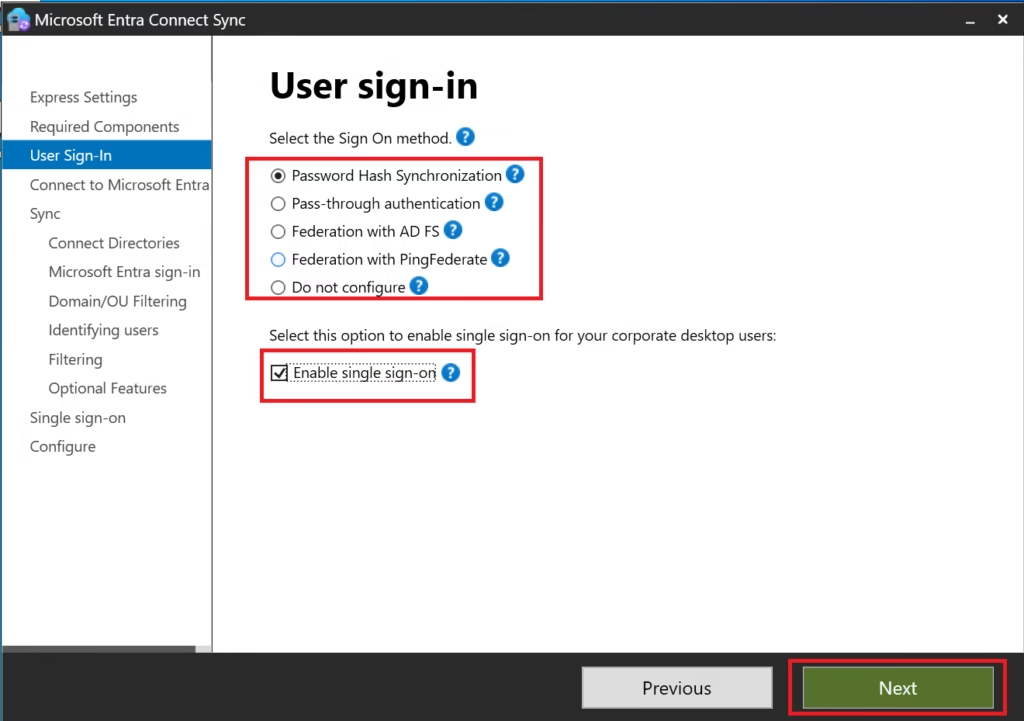
This is:
- Microsoft’s recommended default
- The most widely deployed method
- The simplest to operate and troubleshoot
MS‑102 Exam Note:
Password Hash Sync is the default and recommended authentication method unless stated otherwise.
Click Next.
Step 5: Connect to Microsoft Entra ID
Sign in using:
- Global Administrator account
- Password + MFA (not passkey‑only)
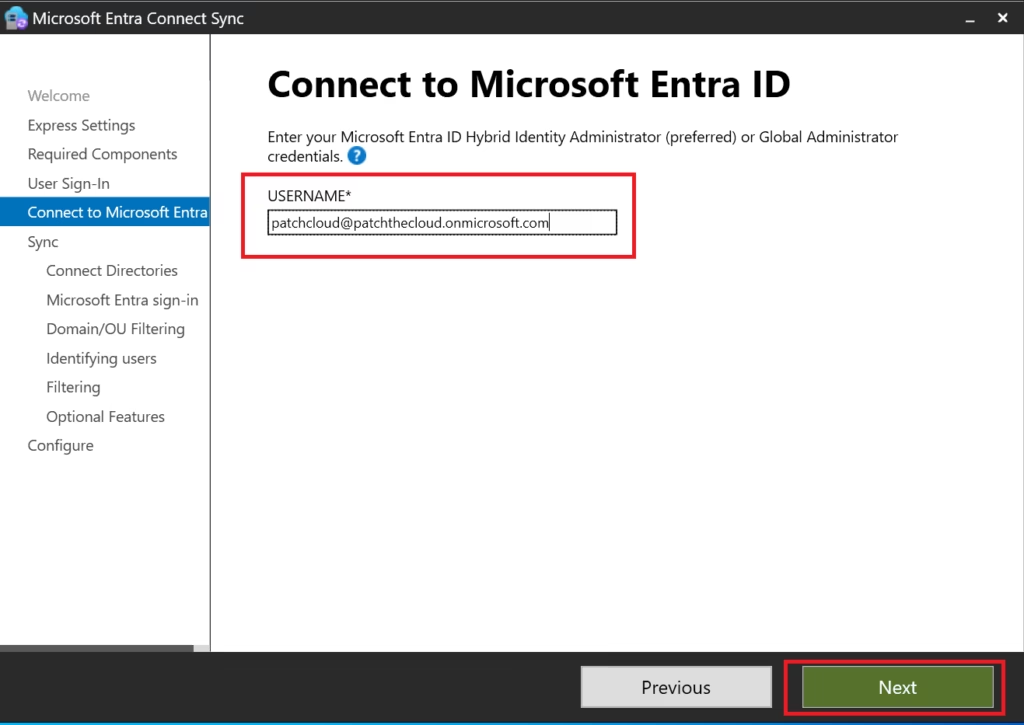
This account is used only during setup.
Step 6: Connect Directories (On‑Prem AD)
Provide:
- On‑premises Domain Admin credentials
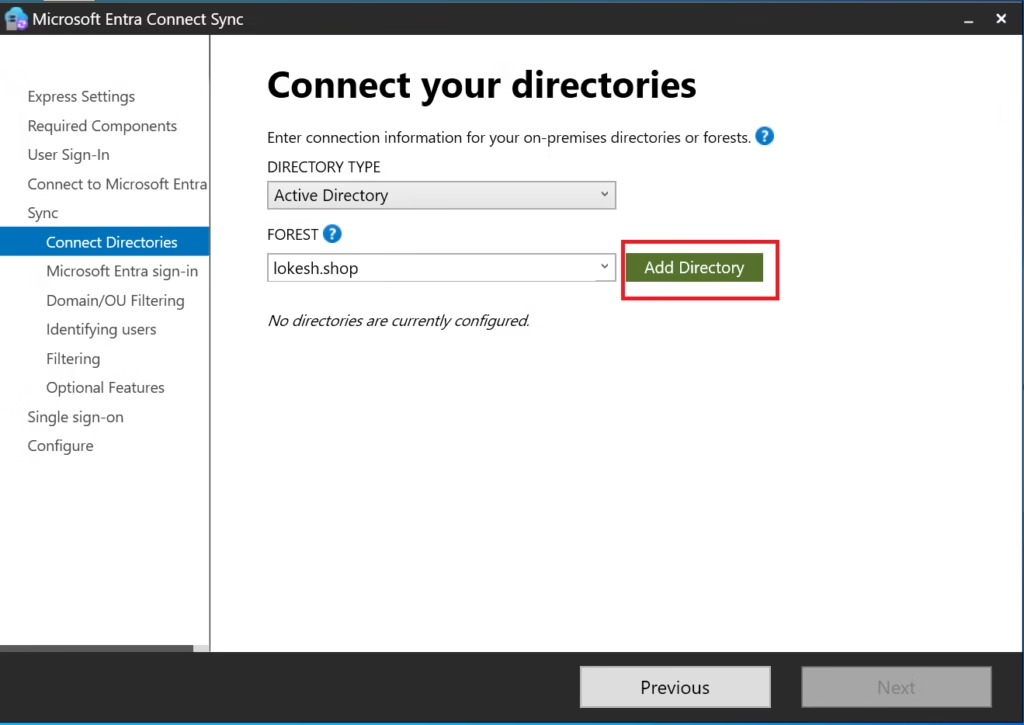
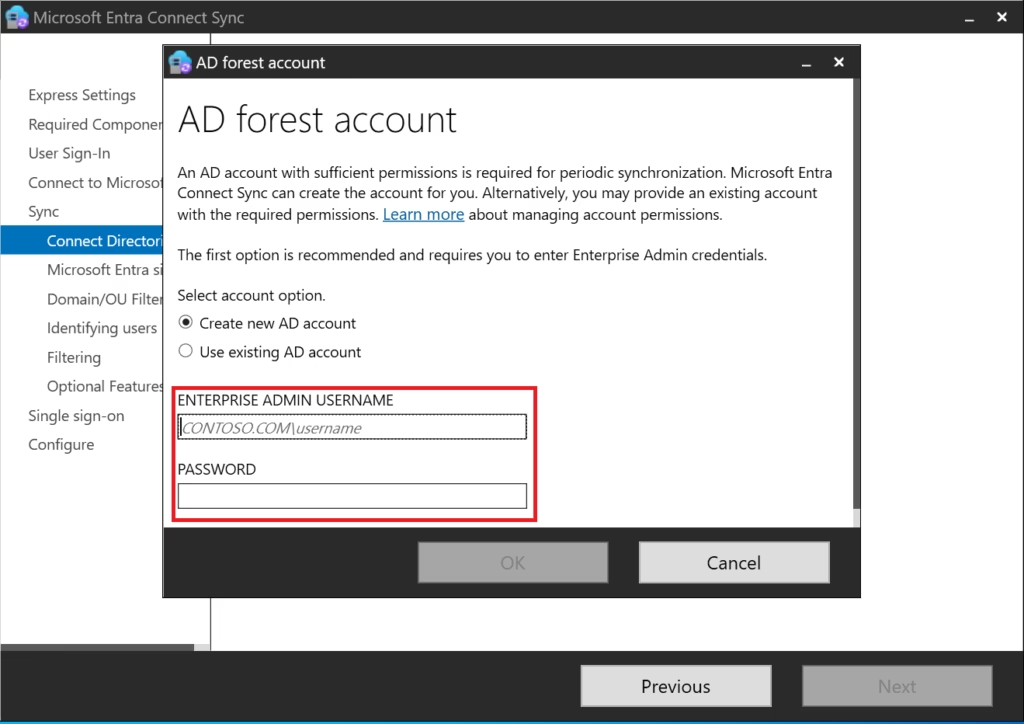
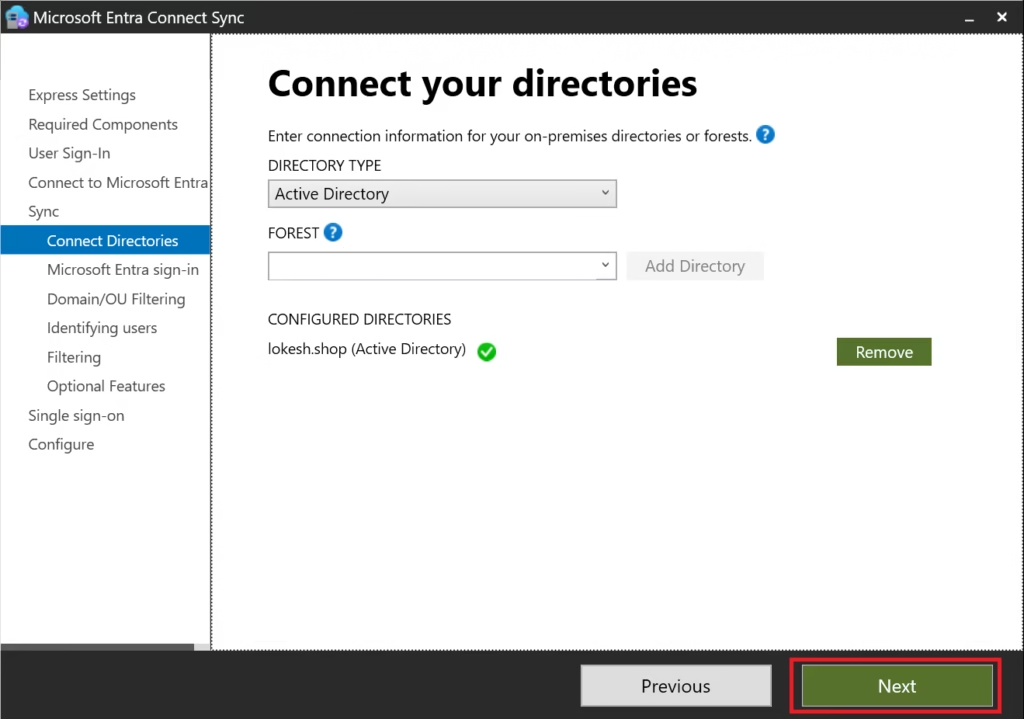
Entra Connect will:
- Discover the forest
- Create connector accounts
- Validate permissions
A green checkmark confirms a successful connection.
Step 7: Microsoft Entra Sign‑In Configuration
Confirm:
- UPN suffix is verified
userPrincipalNameis selected as the sign‑in attribute
Do not change this unless there is a business requirement.
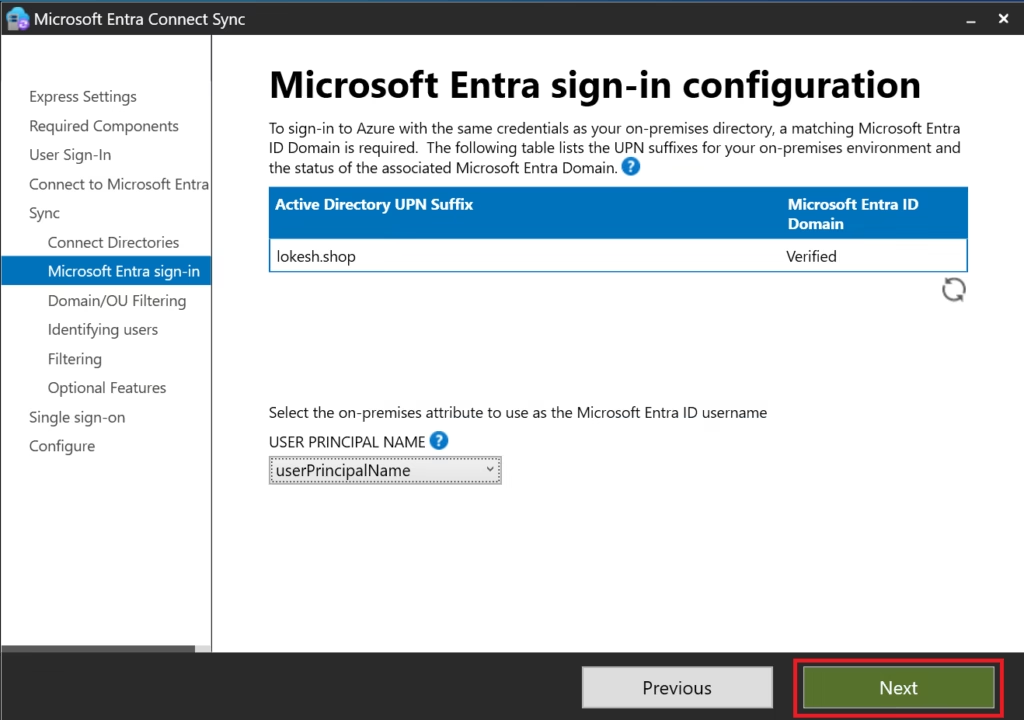
This ensures:
- Consistent sign‑in identity
- Clean hybrid authentication
- Fewer support issues
Step 8: Domain and OU Filtering
Select:
- Sync all domains and OUs
This ensures:
- All eligible objects sync
- No unexpected missing users
Filtering is a separate topic and lab (covered later in this series).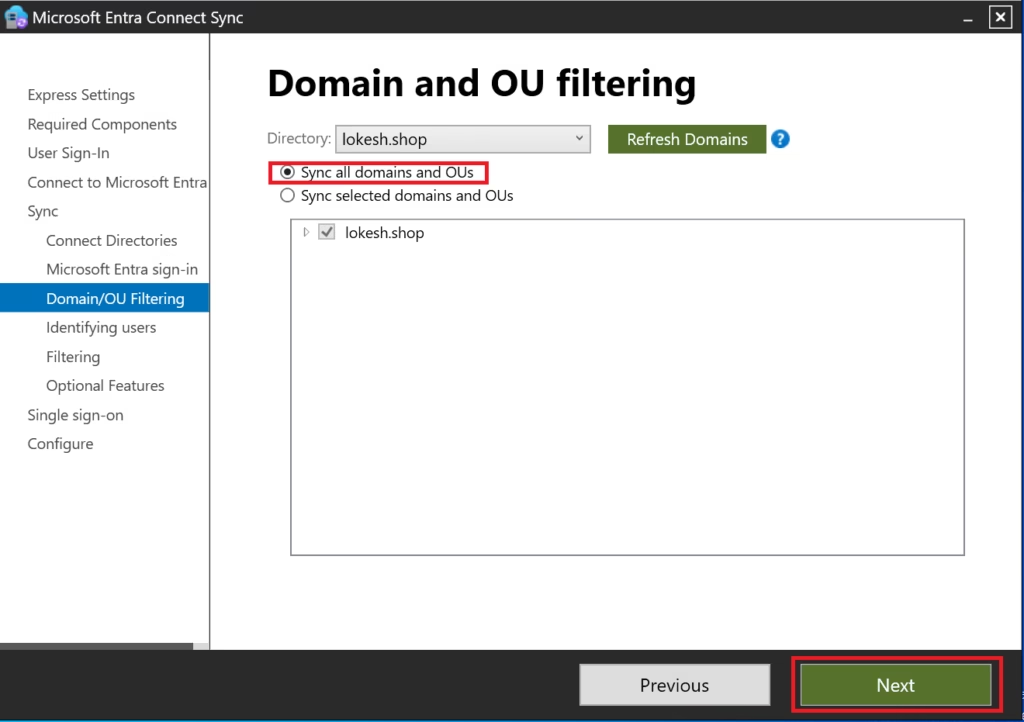
Step 9: Filter Users and Devices
Select:
- Synchronize all users and devices
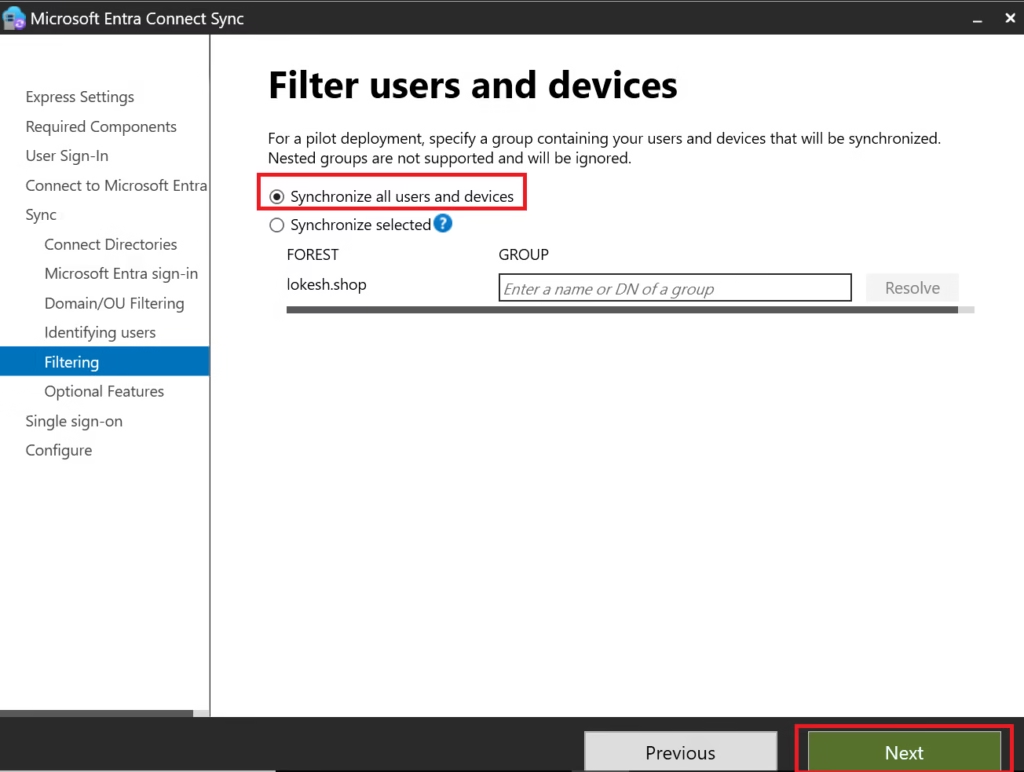
Why:
- Best practice for initial deployment
- Prevents accidental exclusions
- Simplifies verification
Filtering is introduced after initial sync.
Step 10: Optional Features
Select only:
- Password hash synchronization
- Password writeback
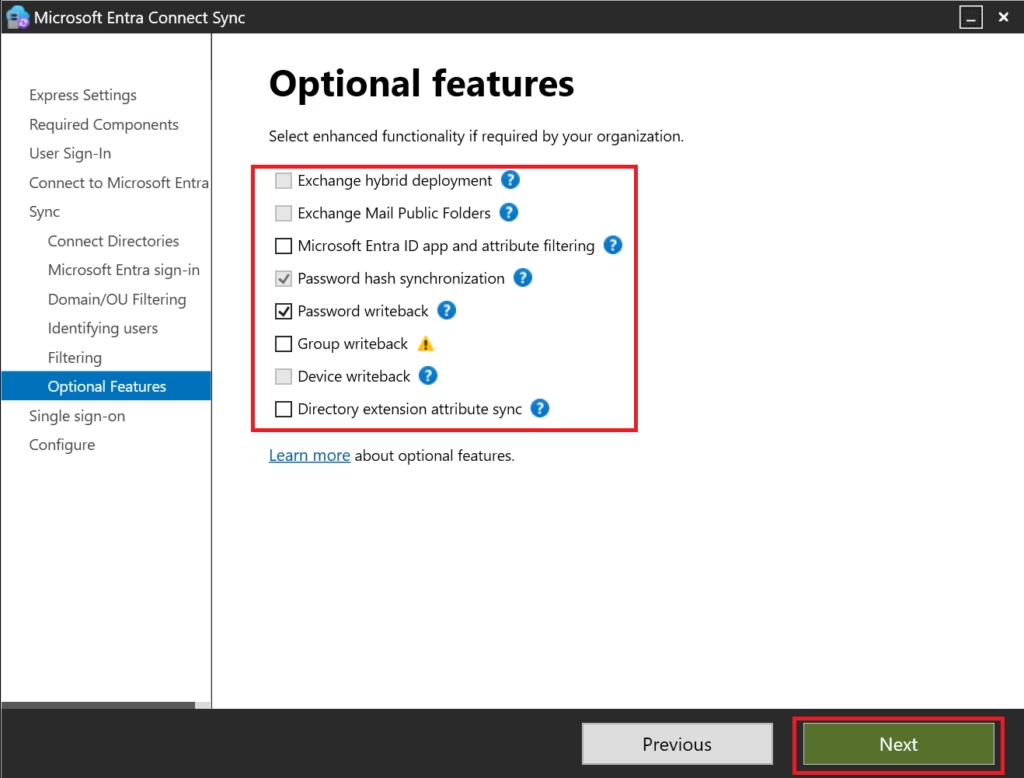
Leave everything else unchecked.
Why:
- Password writeback enables self‑service password reset
- Other options add complexity and are not required initially
Step 11: Single Sign‑On (Seamless SSO)
Select:
Enable Seamless Single Sign‑On (optional)

This allows:
- Domain‑joined devices to authenticate silently
- Improved user experience in corporate networks
This is commonly tested in MS‑102.
Step 12: Staging Mode
Do NOT enable staging mode
Staging mode is only for:
- Secondary Entra Connect servers
- Disaster recovery
- Testing rule changes
For initial deployment, staging mode must remain disabled.
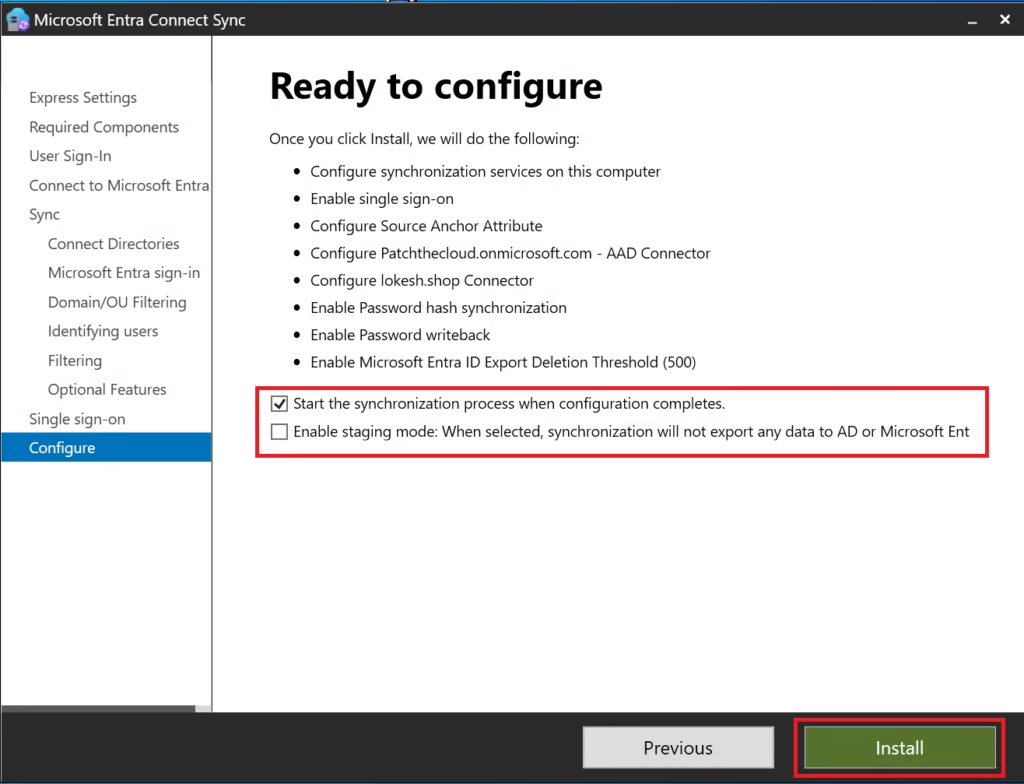
Step 13: Configure and Install
Review configuration summary.
Click Install.
Microsoft Entra Connect will:
- Install services
- Configure synchronization rules
- Start initial full sync
- Schedule a delta sync every 30 minutes
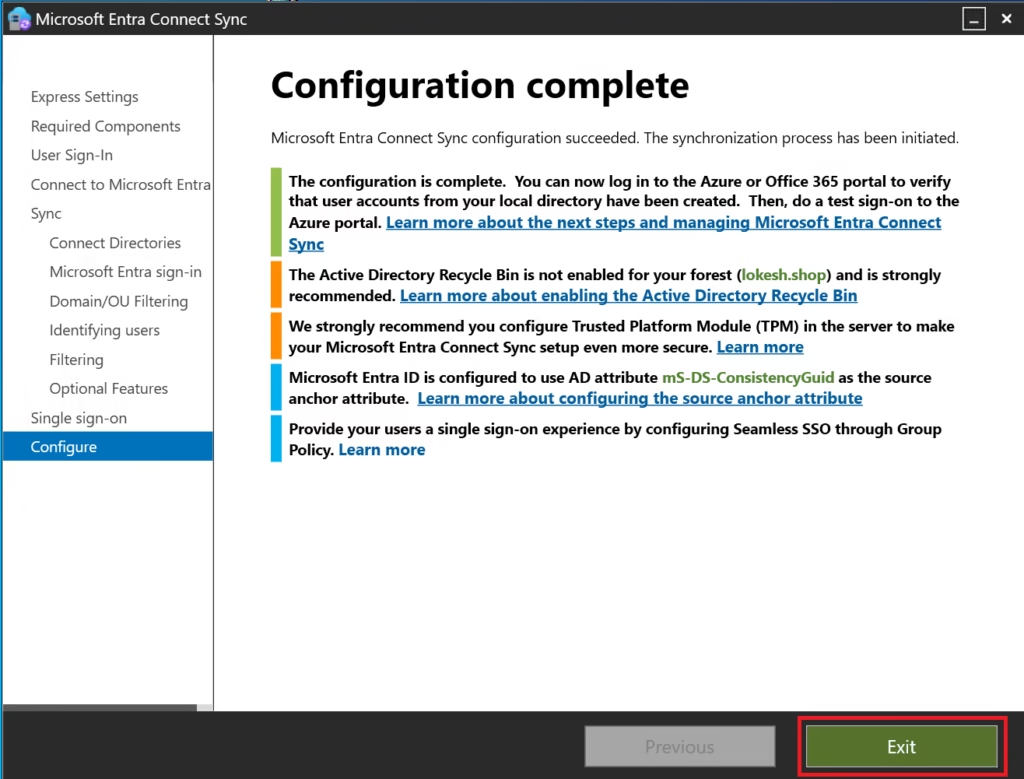
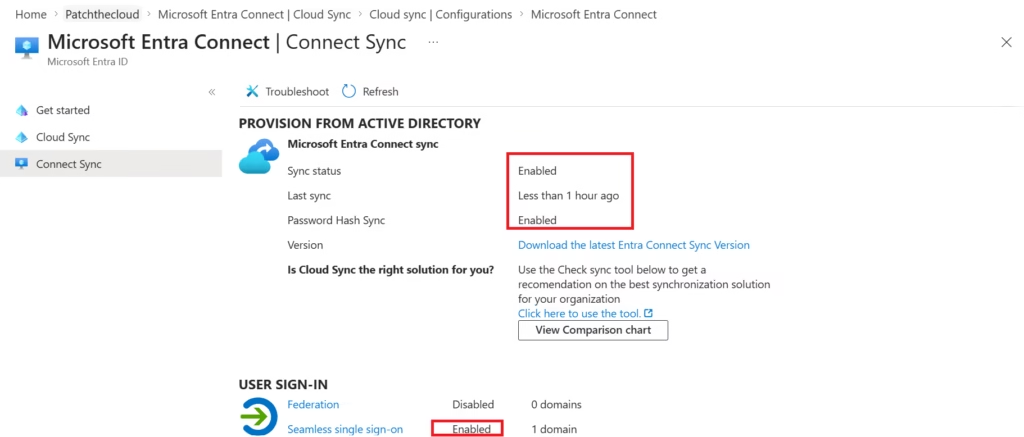
Verify Synchronization
After installation:
- Go to Microsoft Entra Admin Center
- Entra ID → Entra Connect → Connect Sync
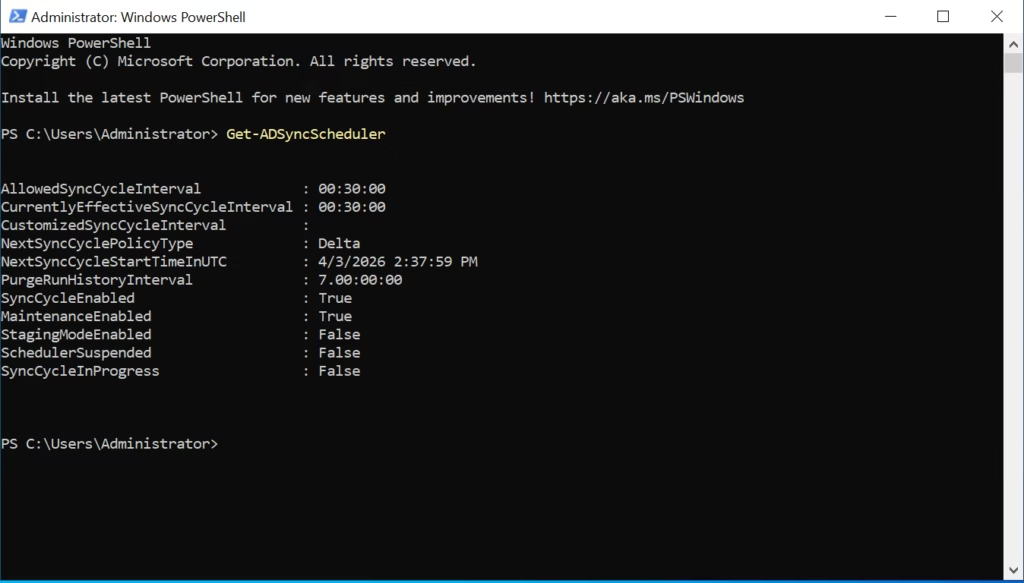
You can also verify using:
- Synchronization Service Manager
- PowerShell (
Get-ADSyncScheduler)
Important Notes
- If your organization is cloud-only (no on-prem AD), → You can skip Microsoft Entra Connect completely
- Install on a dedicated server, not a Domain Controller (best practice)
- Keep Entra Connect updated regularly
Exam Tip (MS-102)
- Know the difference between:
- Password Hash Sync
- Pass-through Authentication
- Federation
- Understand when to use Microsoft Entra Connect vs cloud-only identity
Conclusion
Setting up Microsoft Entra Connect is the foundation of hybrid identity.
Once configured, it ensures:
- Seamless login experience
- Centralized identity management
- Better security & compliance
Next Step
Continue your learning with:
Authentication Methods in Hybrid Environments (Coming Next)
Previous Topic
If you haven’t explored it yet:
Clean Up Active Directory Using IdFix Tool
http://techcertguide.blog/idfix-tool-complete-guide-ms-102
Start from the Beginning
MS-102 Microsoft 365 Administrator Overview
https://techcertguide.blog/ms-102-microsoft-365-administration/
Official Microsoft Reference
https://learn.microsoft.com/en-us/certifications/exams/ms-102
3 thoughts on “Mastering Hybrid Identity: Microsoft Entra Connect Step-by-Step (MS-102)”