Introduction
In today’s hybrid IT environments, organizations often maintain both on-premises Active Directory and cloud-based identities in Microsoft 365. Managing identities separately in both environments can quickly become complex and error-prone.
This is where Microsoft Entra Connect plays a crucial role.
Microsoft Entra Connect is a synchronization tool that bridges your on-premises Active Directory with Microsoft Entra ID (formerly Azure AD). It ensures that users, groups, and credentials are consistently available across both environments.
Why is Entra Connect Important?
- Enables Hybrid Identity
- Reduces manual user management
- Supports Single Sign-On (SSO)
- Provides authentication options like:
- Password Hash Synchronization (PHS)
- Pass-through Authentication (PTA)
- Federation (ADFS)
For MS-102 exam preparation and real-world implementation, understanding this setup is essential.
Prerequisites (Don’t Skip This!)
Before installing Entra Connect, you must prepare your environment properly.
Server Requirements
Ensure your server meets the following:
- OS: Windows Server 2016 or later (2019/2022 recommended)
- Domain-joined server
- Minimum:
- 4 GB RAM (8 GB recommended)
- 70 GB disk space
- .NET Framework 4.7.2 or later
Best Practice: Install on a dedicated member server, not a Domain Controller.
Required Accounts
You will need:
- Enterprise Admin Account (on-prem AD)
- Global Administrator Account (Microsoft 365)
Tip: Use temporary elevated accounts and avoid permanent high-privilege usage.
Network & Security Requirements
- Internet access to Microsoft 365 endpoints
- TLS 1.2 enabled
- Firewall ports open (HTTPS 443)
If you’re using a firewall like FortiGate (like your setup), ensure outbound access is not restricted.
Install Microsoft Entra Connect on Windows Server
Step 1: Download Entra Connect
Download the latest Microsoft Entra Connect Sync installer from the Microsoft Entra admin portal or official Microsoft link.
Run the installer as Administrator.
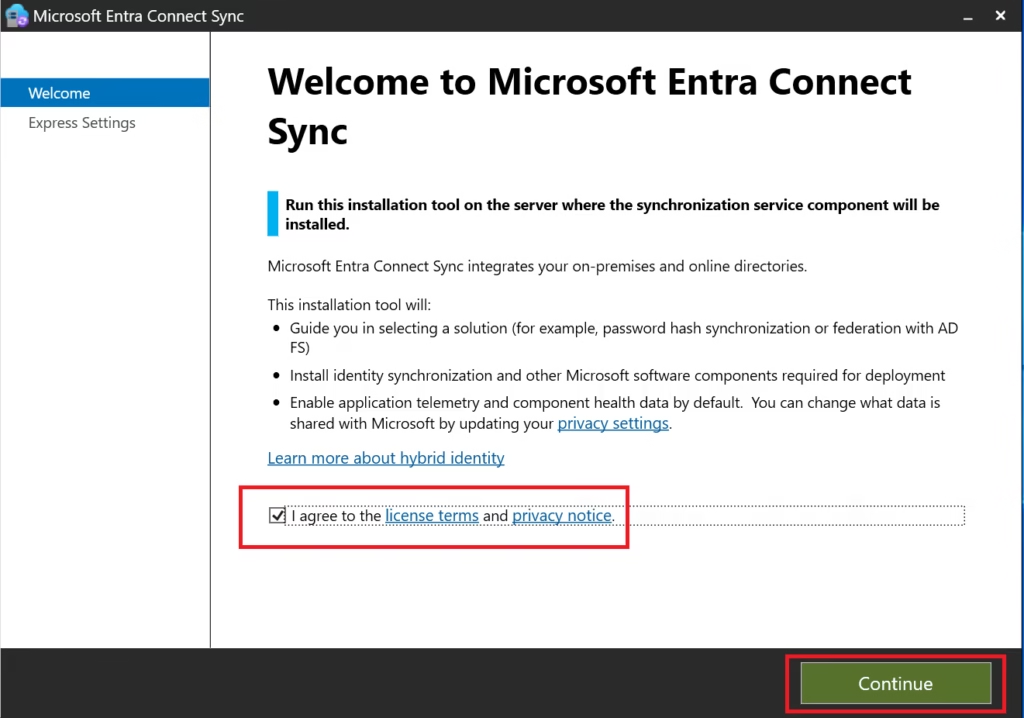
Step 2: Choose Installation Type
Select:
- Customize
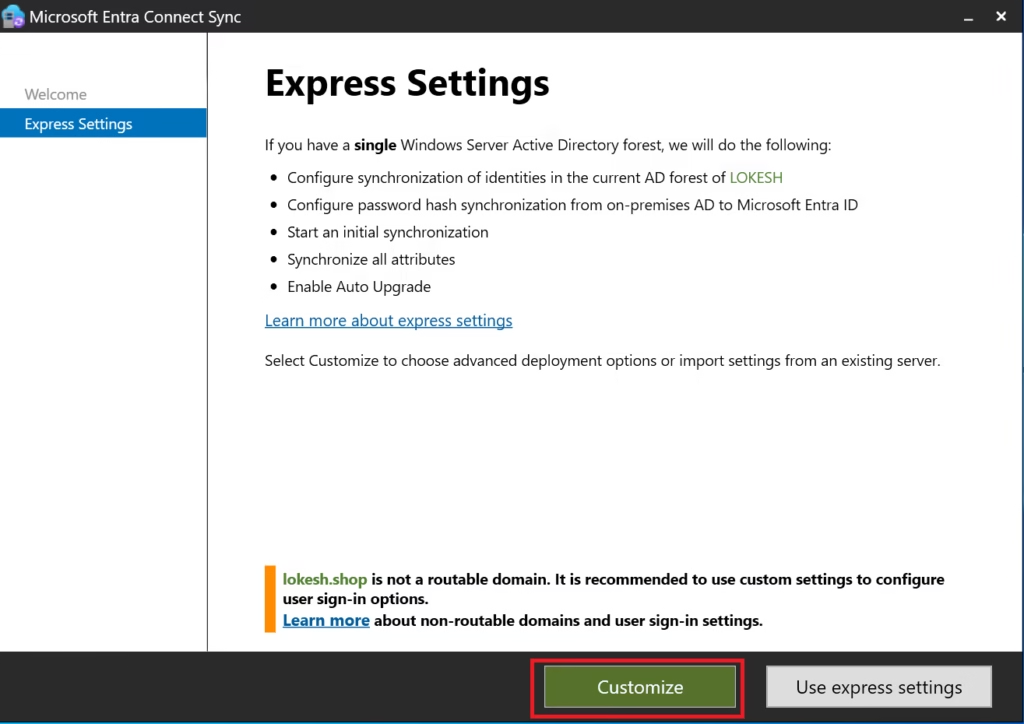
Why:
- Express settings hide important decisions
- MS‑102 expects an understanding of installation choices
- Custom install allows complete visibility
Click Next.
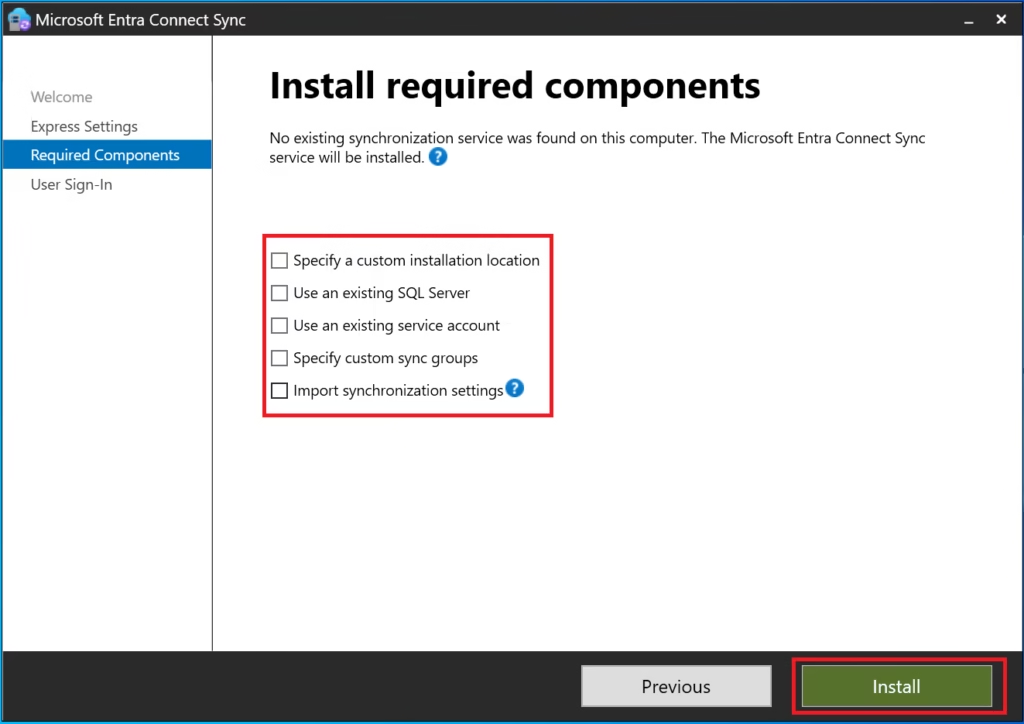
Step 3: Required Components
Leave default selections enabled:
- Synchronization services
- SQL Express (for small/medium environments)
Click Next.
Step 4: User Sign‑In Method
Select:
- Password Hash Synchronization
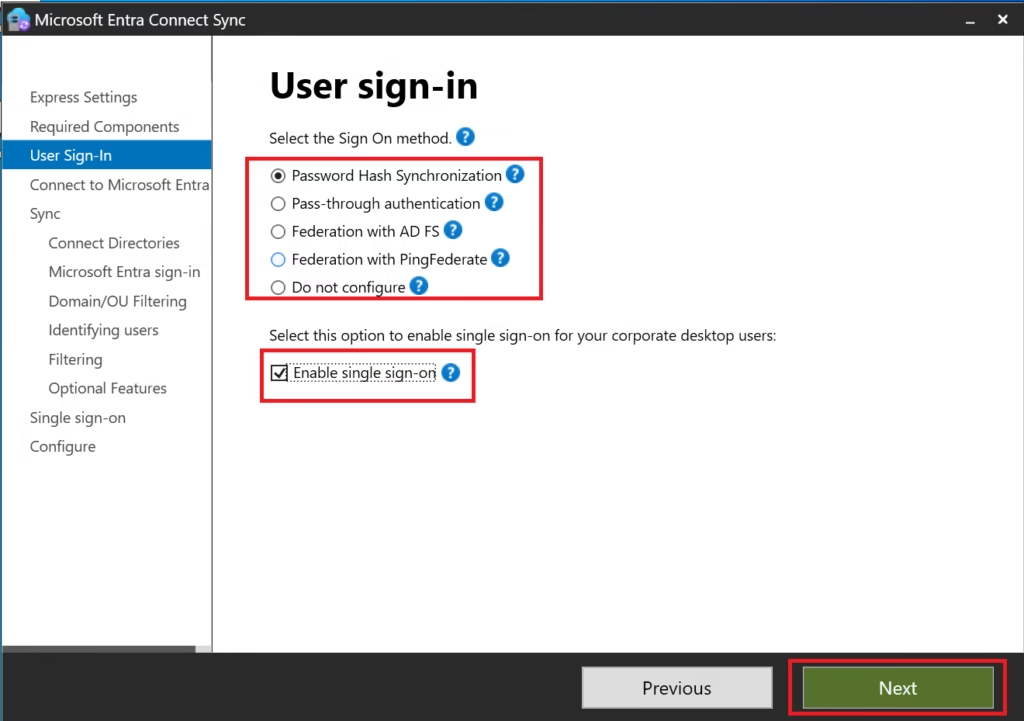
This is:
- Microsoft’s recommended default
- The most widely deployed method
- The simplest to operate and troubleshoot
MS‑102 Exam Note:
Password Hash Sync is the default and recommended authentication method unless stated otherwise.
Click Next.
Step 5: Connect to Microsoft Entra ID
Sign in using:
- Global Administrator account
- Password + MFA (not passkey‑only)
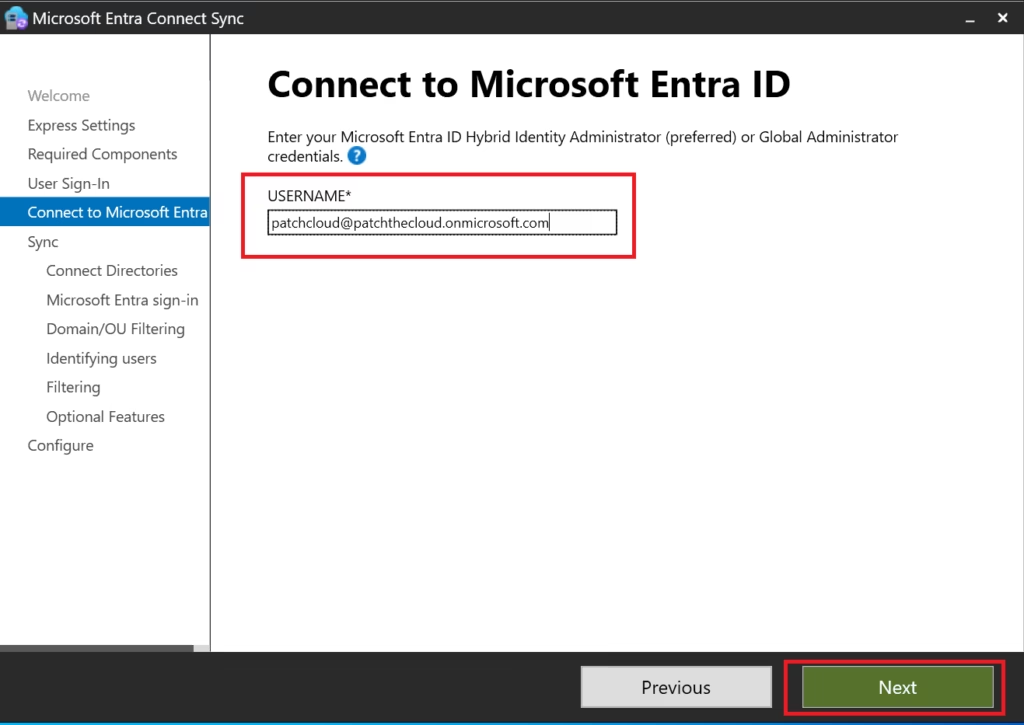
This account is used only during setup.
Step 6: Connect Directories (On‑Prem AD)
Provide:
- On‑premises Domain Admin credentials
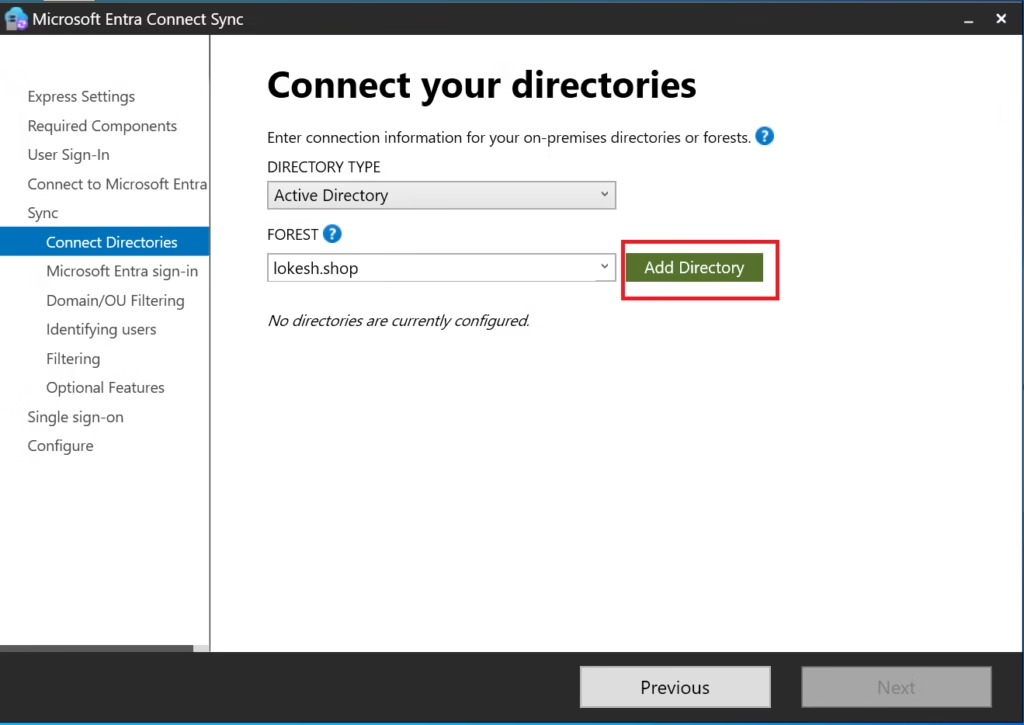
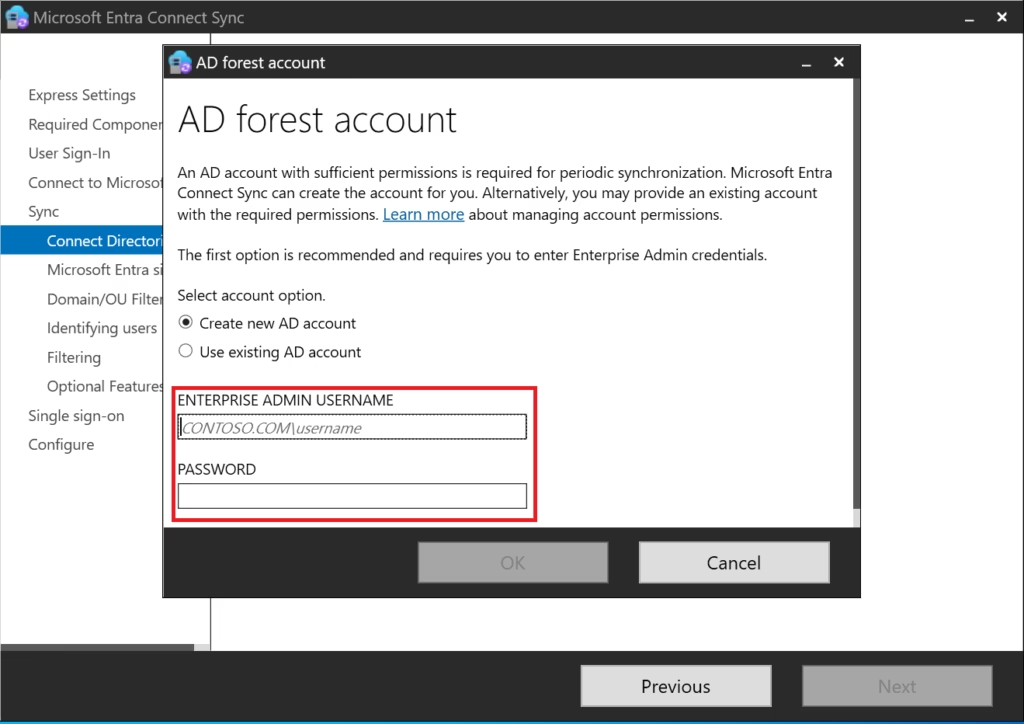
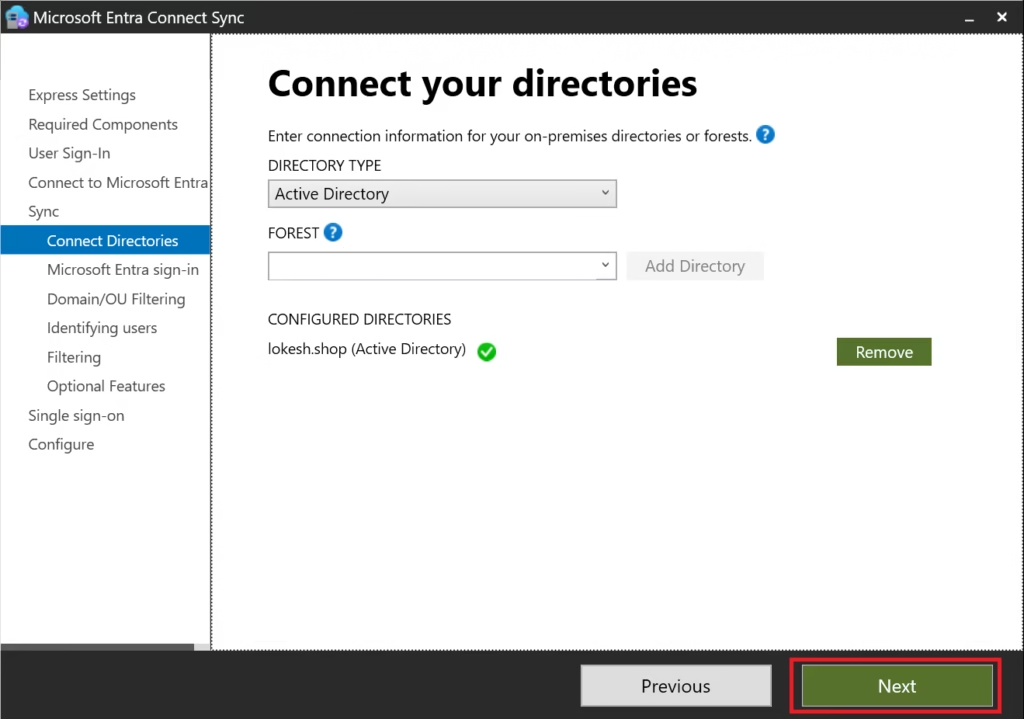
Entra Connect will:
- Discover the forest
- Create connector accounts
- Validate permissions
A green checkmark confirms a successful connection.
Step 7: Microsoft Entra Sign‑In Configuration
Confirm:
- UPN suffix is verified
userPrincipalNameis selected as the sign‑in attribute
Do not change this unless there is a business requirement.
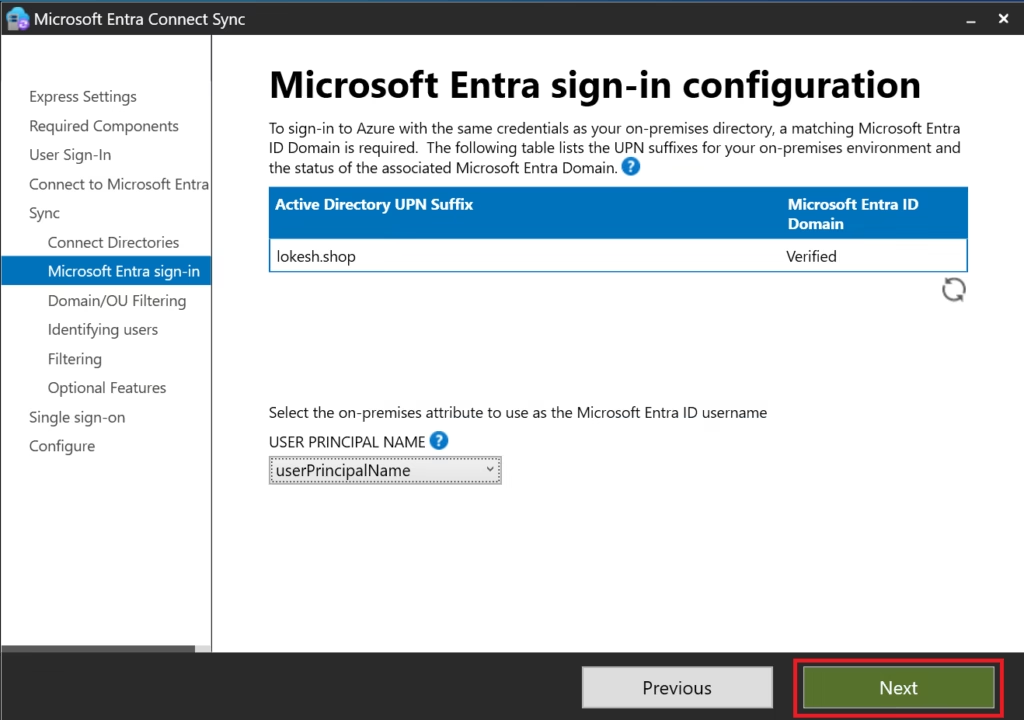
This ensures:
- Consistent sign‑in identity
- Clean hybrid authentication
- Fewer support issues
Step 8: Domain and OU Filtering
Select:
- Sync all domains and OUs
This ensures:
- All eligible objects sync
- No unexpected missing users
Filtering is a separate topic and lab (covered later in this series).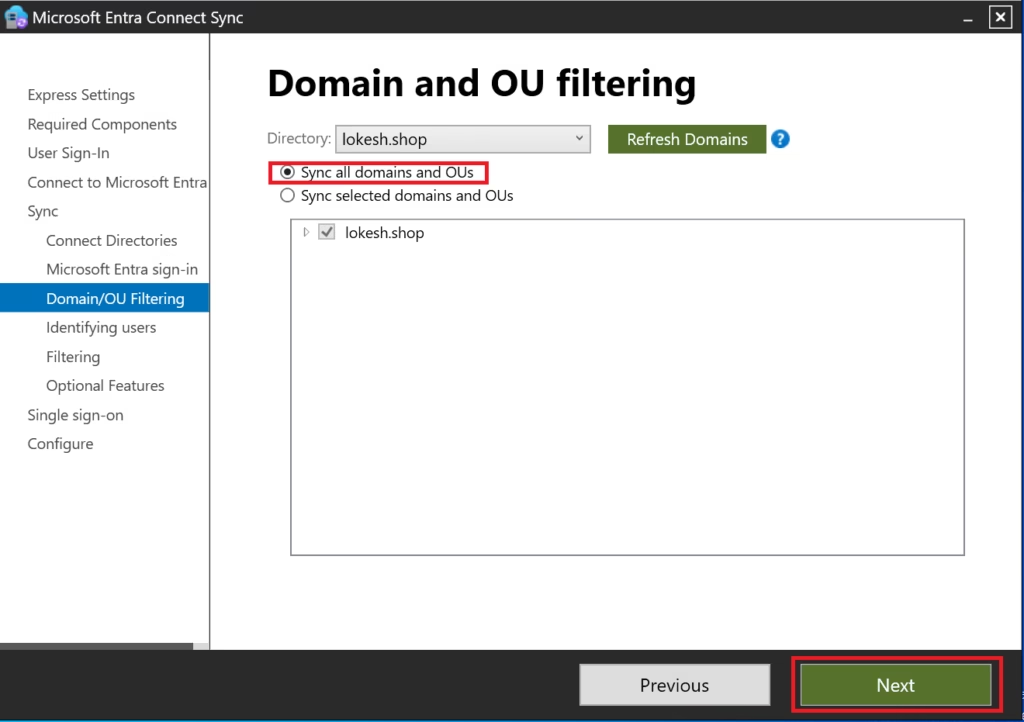
Step 9: Filter Users and Devices
Select:
- Synchronize all users and devices
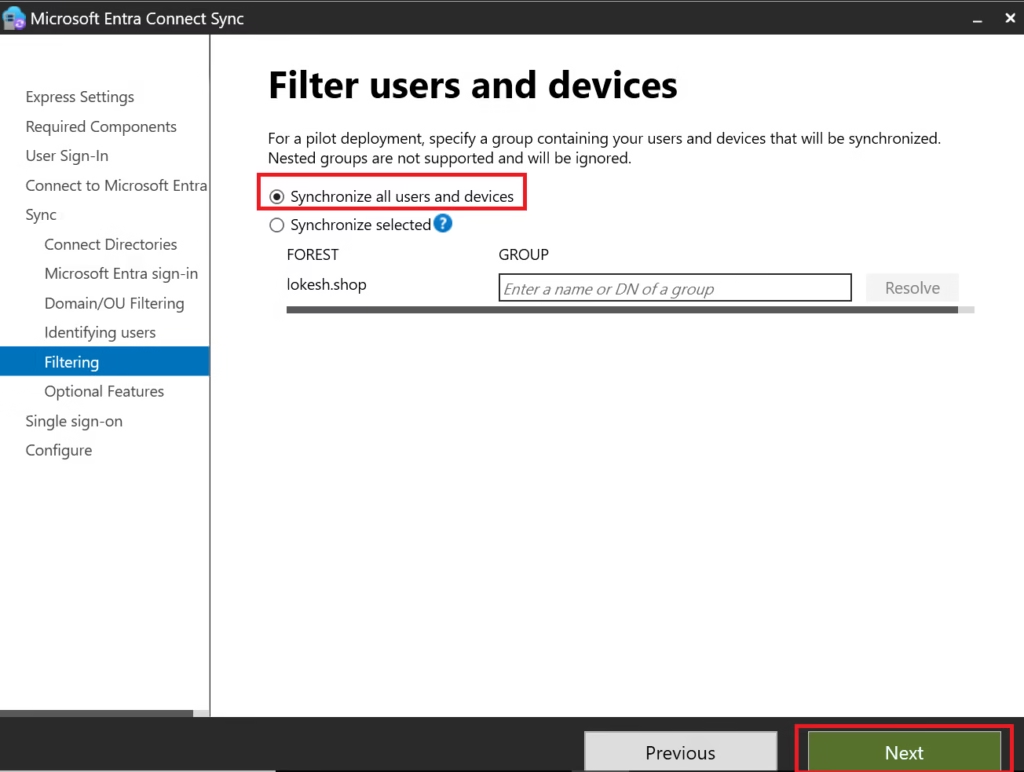
Why:
- Best practice for initial deployment
- Prevents accidental exclusions
- Simplifies verification
Filtering is introduced after initial sync.
Step 10: Optional Features
Select only:
- Password hash synchronization
- Password writeback
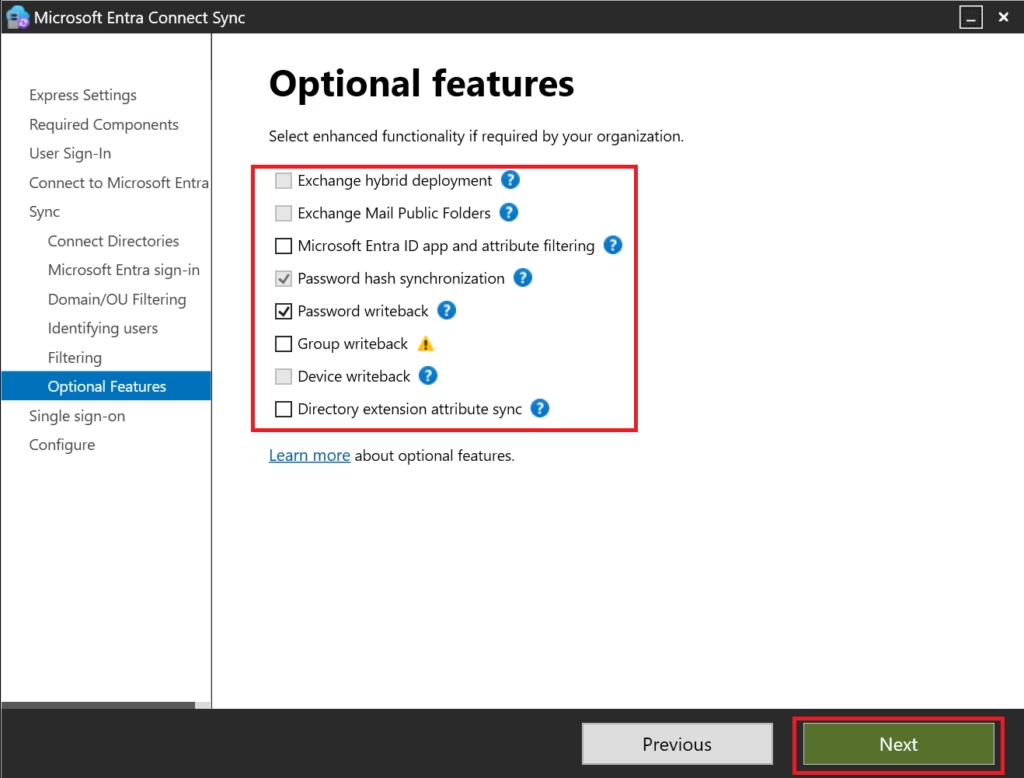
Leave everything else unchecked.
Why:
- Password writeback enables self‑service password reset
- Other options add complexity and are not required initially
Step 11: Single Sign‑On (Seamless SSO)
Select:
Enable Seamless Single Sign‑On (optional)

This allows:
- Domain‑joined devices to authenticate silently
- Improved user experience in corporate networks
This is commonly tested in MS‑102.
Step 12: Staging Mode
Do NOT enable staging mode
Staging mode is only for:
- Secondary Entra Connect servers
- Disaster recovery
- Testing rule changes
For initial deployment, staging mode must remain disabled.
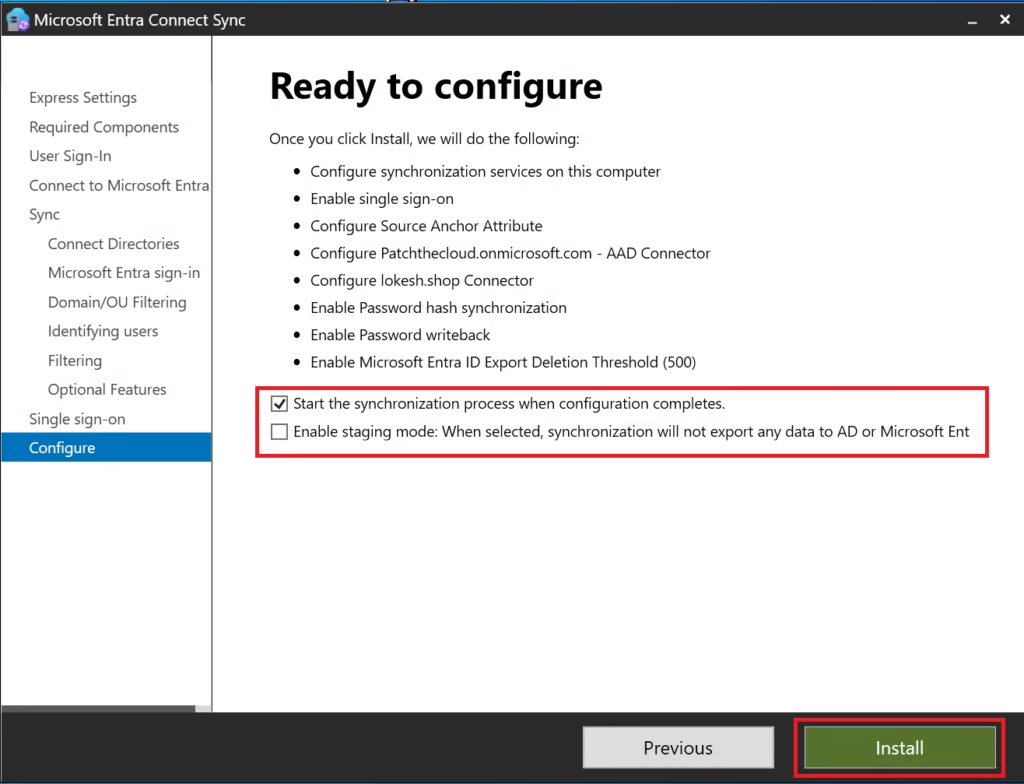
Step 13: Configure and Install
Review configuration summary.
Click Install.
Microsoft Entra Connect will:
- Install services
- Configure synchronization rules
- Start initial full sync
- Schedule a delta sync every 30 minutes
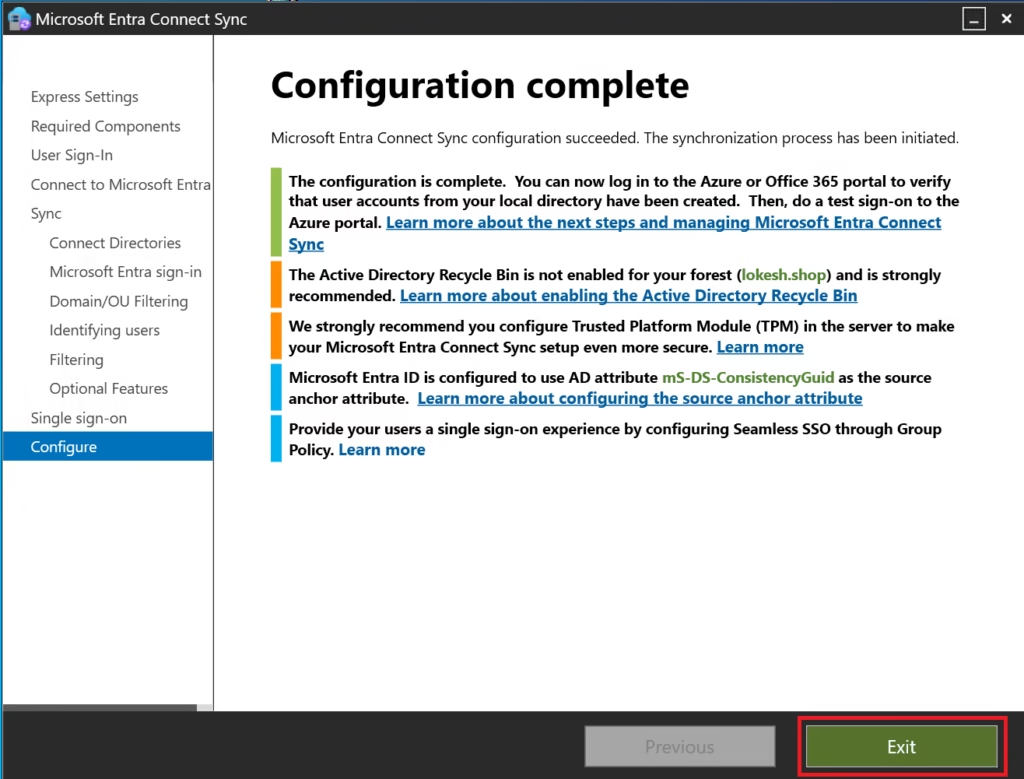
Verify Synchronization
After installation:
- Go to Microsoft Entra Admin Center
- Entra ID → Entra Connect → Connect Sync
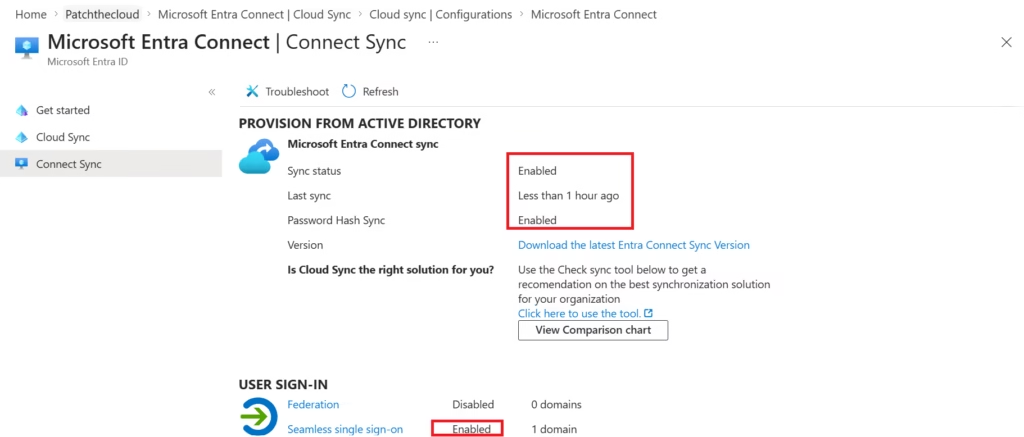
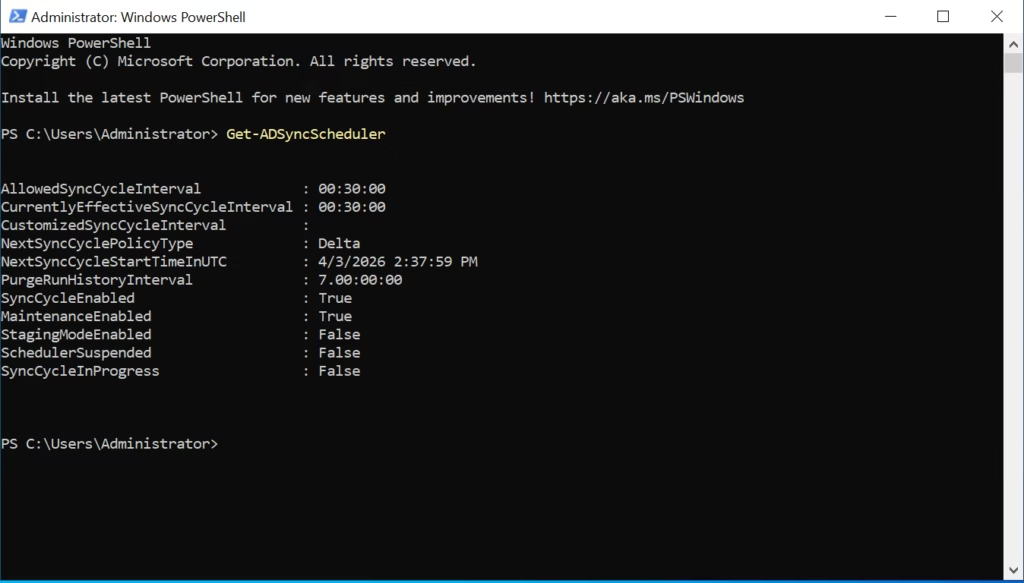
You can also verify using:
- Synchronization Service Manager
- PowerShell (
Get-ADSyncScheduler)
Important Notes
- If your organization is cloud-only (no on-prem AD), → You can skip Microsoft Entra Connect completely
- Install on a dedicated server, not a Domain Controller (best practice)
- Keep Entra Connect updated regularly
Exam Tip (MS-102)
- Know the difference between:
- Password Hash Sync
- Pass-through Authentication
- Federation
- Understand when to use Microsoft Entra Connect vs cloud-only identity
Conclusion
Setting up Microsoft Entra Connect is the foundation of hybrid identity.
Once configured, it ensures:
- Seamless login experience
- Centralized identity management
- Better security & compliance
Next Step
Continue your learning with:
Authentication Methods in Hybrid Environments (Coming Next)
Previous Topic
If you haven’t explored it yet:
Clean Up Active Directory Using IdFix Tool
http://techcertguide.blog/idfix-tool-complete-guide-ms-102
Start from the Beginning
MS-102 Microsoft 365 Administrator Overview
https://techcertguide.blog/ms-102-microsoft-365-administration/
Official Microsoft Reference
https://learn.microsoft.com/en-us/certifications/exams/ms-102
1 thought on “Mastering Hybrid Identity: Microsoft Entra Connect Step-by-Step (MS-102)”